Installation guide
Please follow below instructions. Scroll, swipe or click to go te next page.
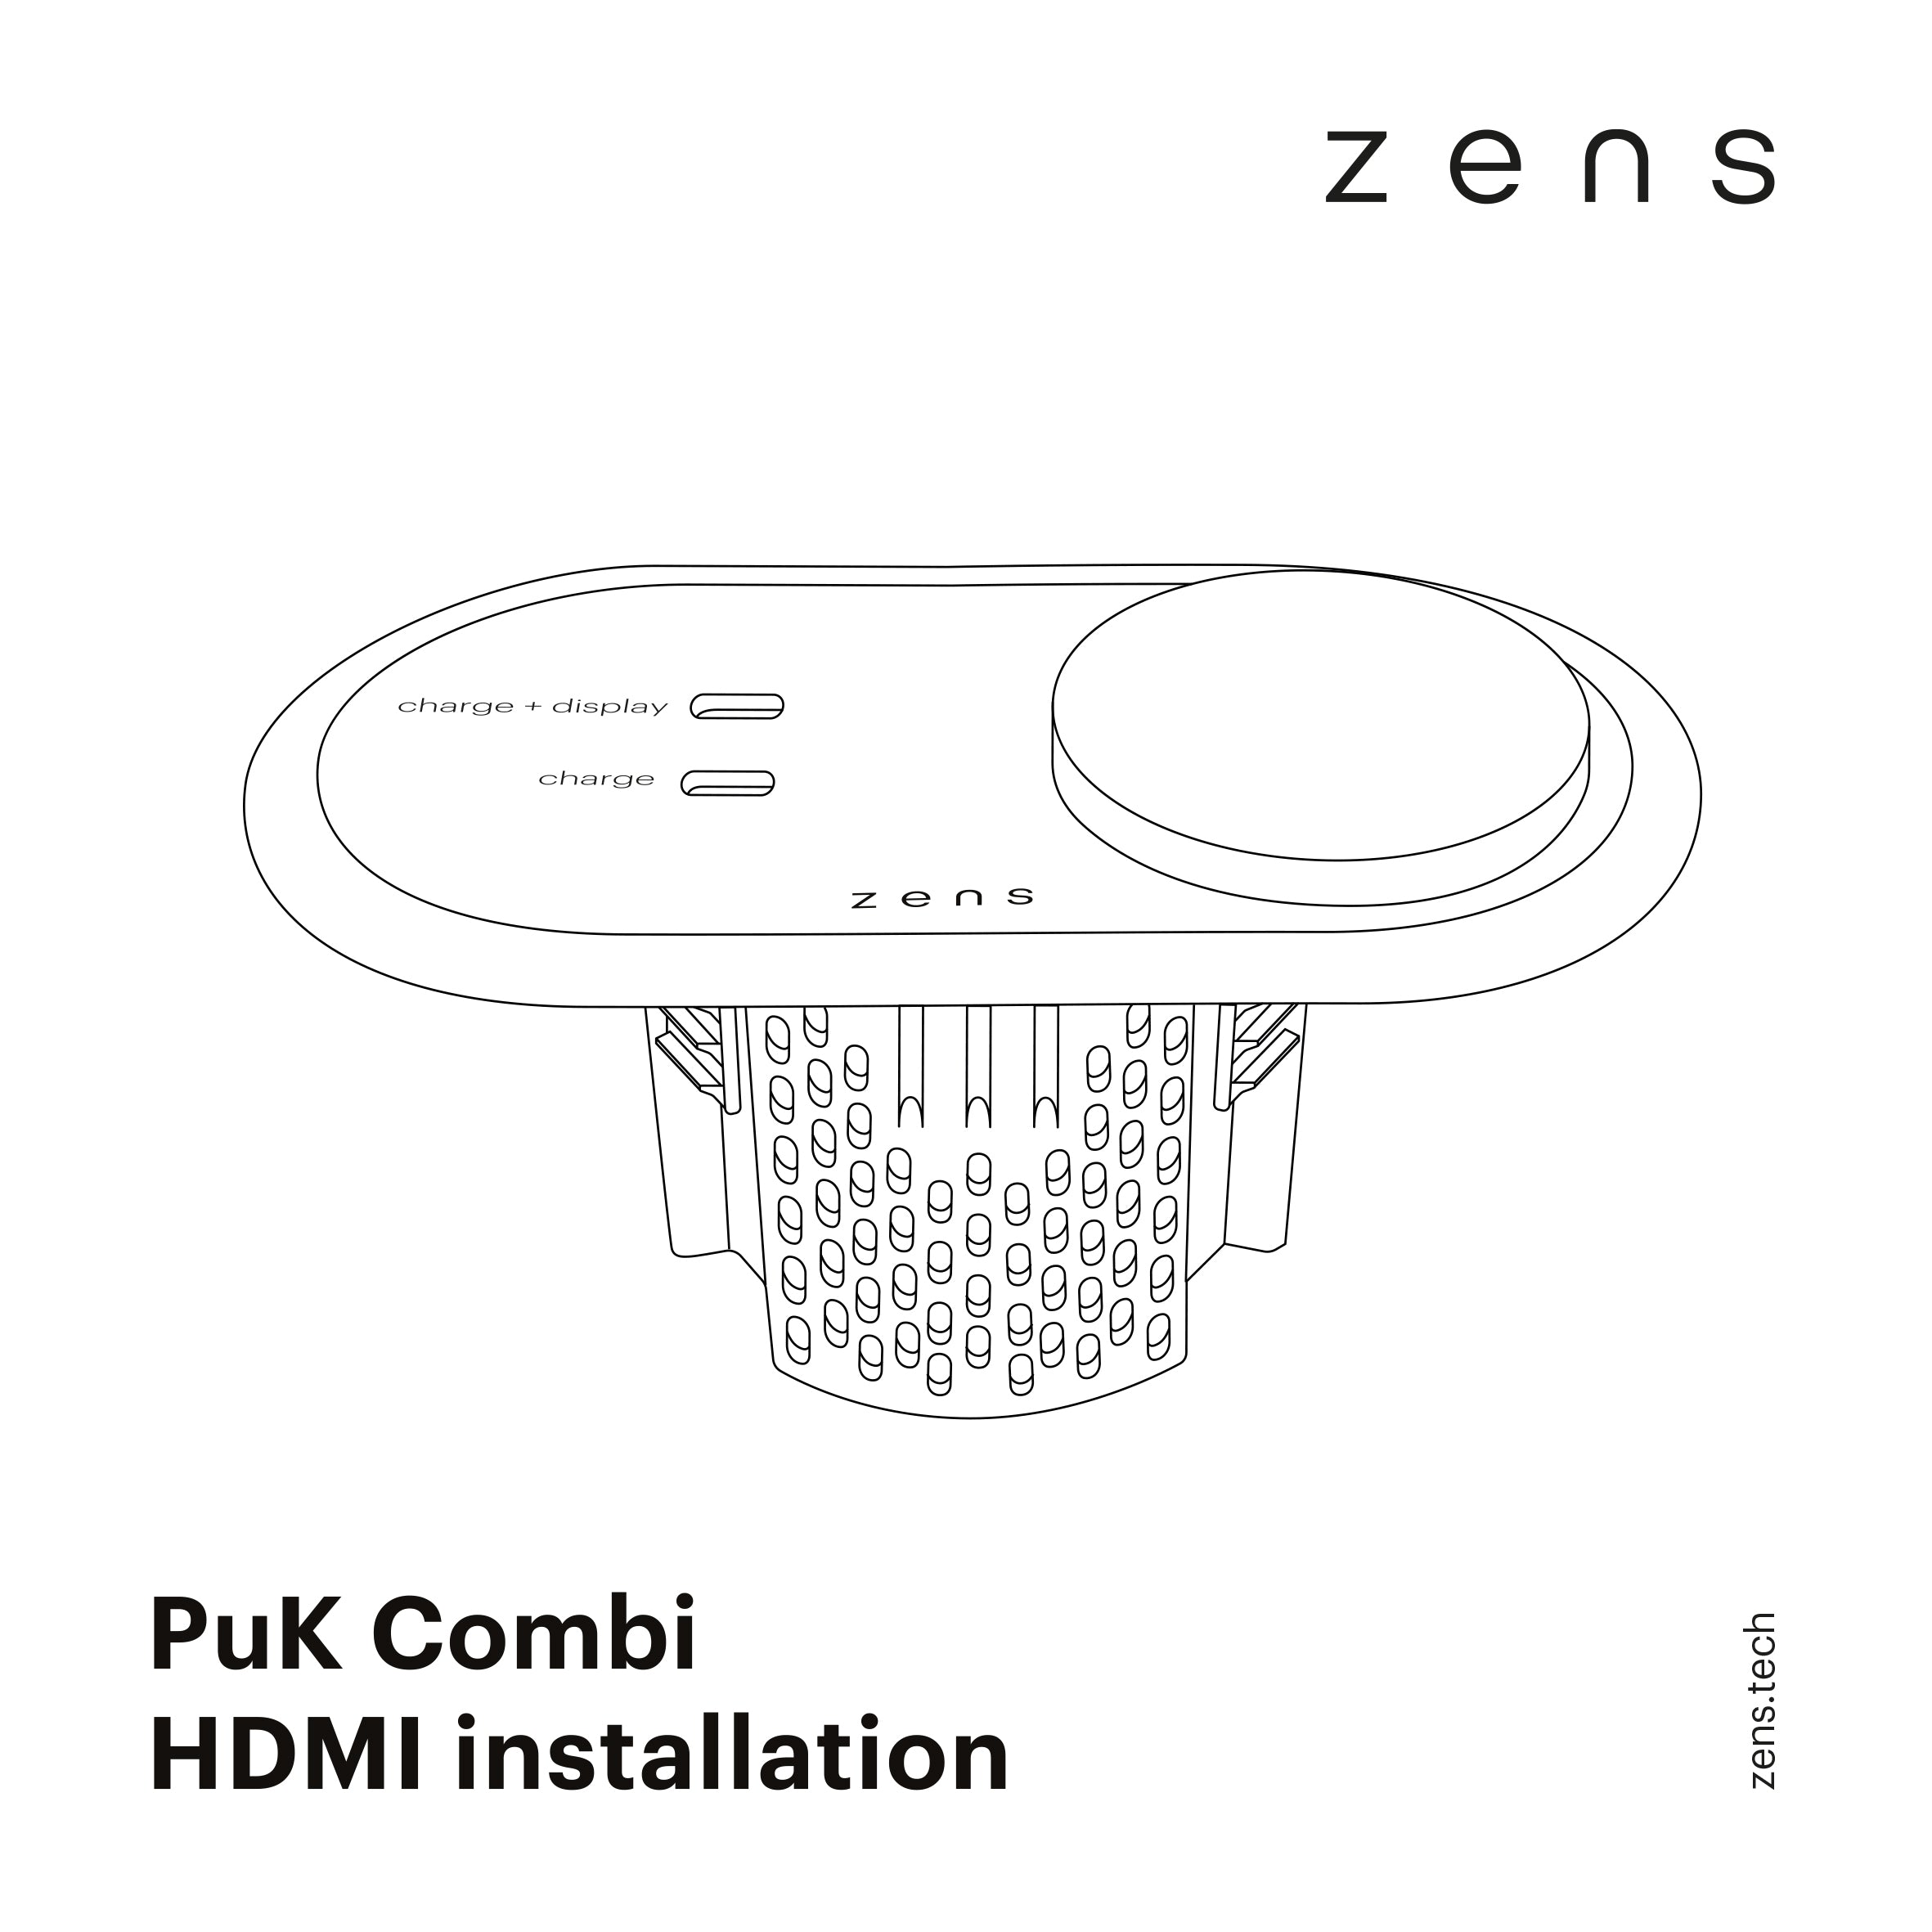
PuK Combi HDMI
Installation guide
Step by step installation guide. Integrate your PuK Combi HDMI seamlessly in your desk.
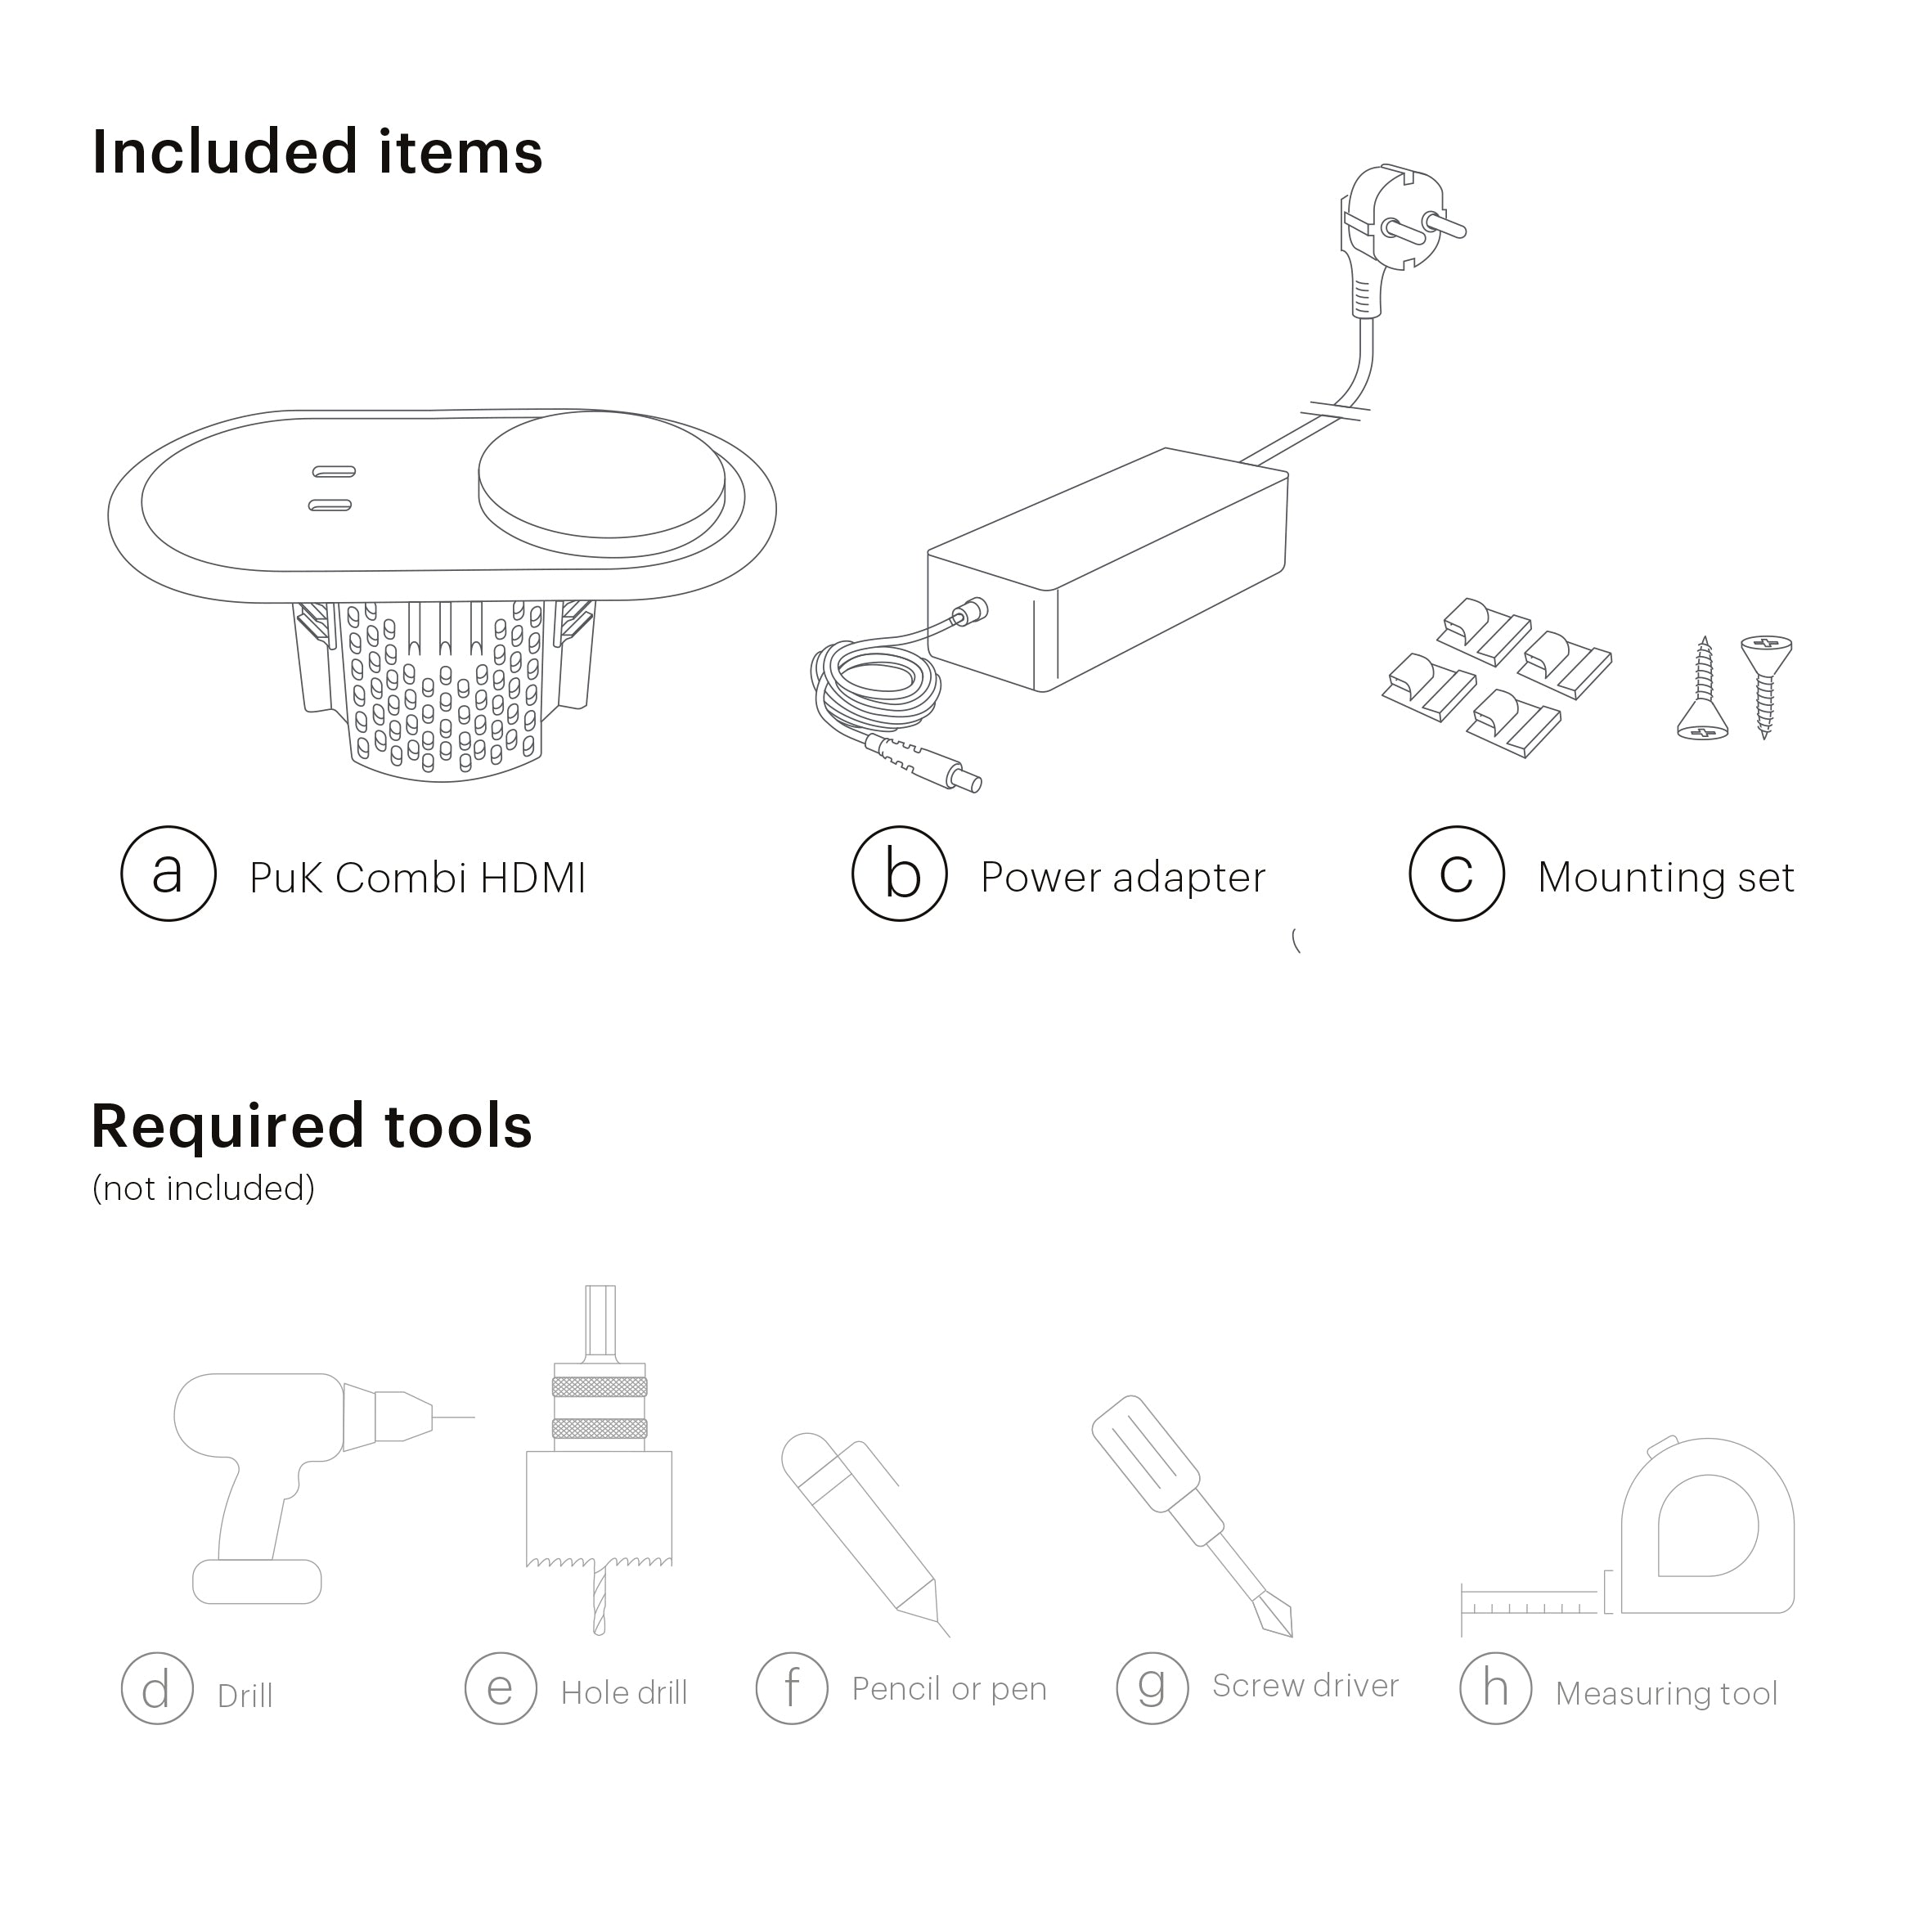
Included items
a) PuK HDMI
b) Power adapter
c) Mounting set
Required tools (not included)
d) Drill
e) Hole drill
f) Pencil or pen
g) Screw driver
h) Measuring tool
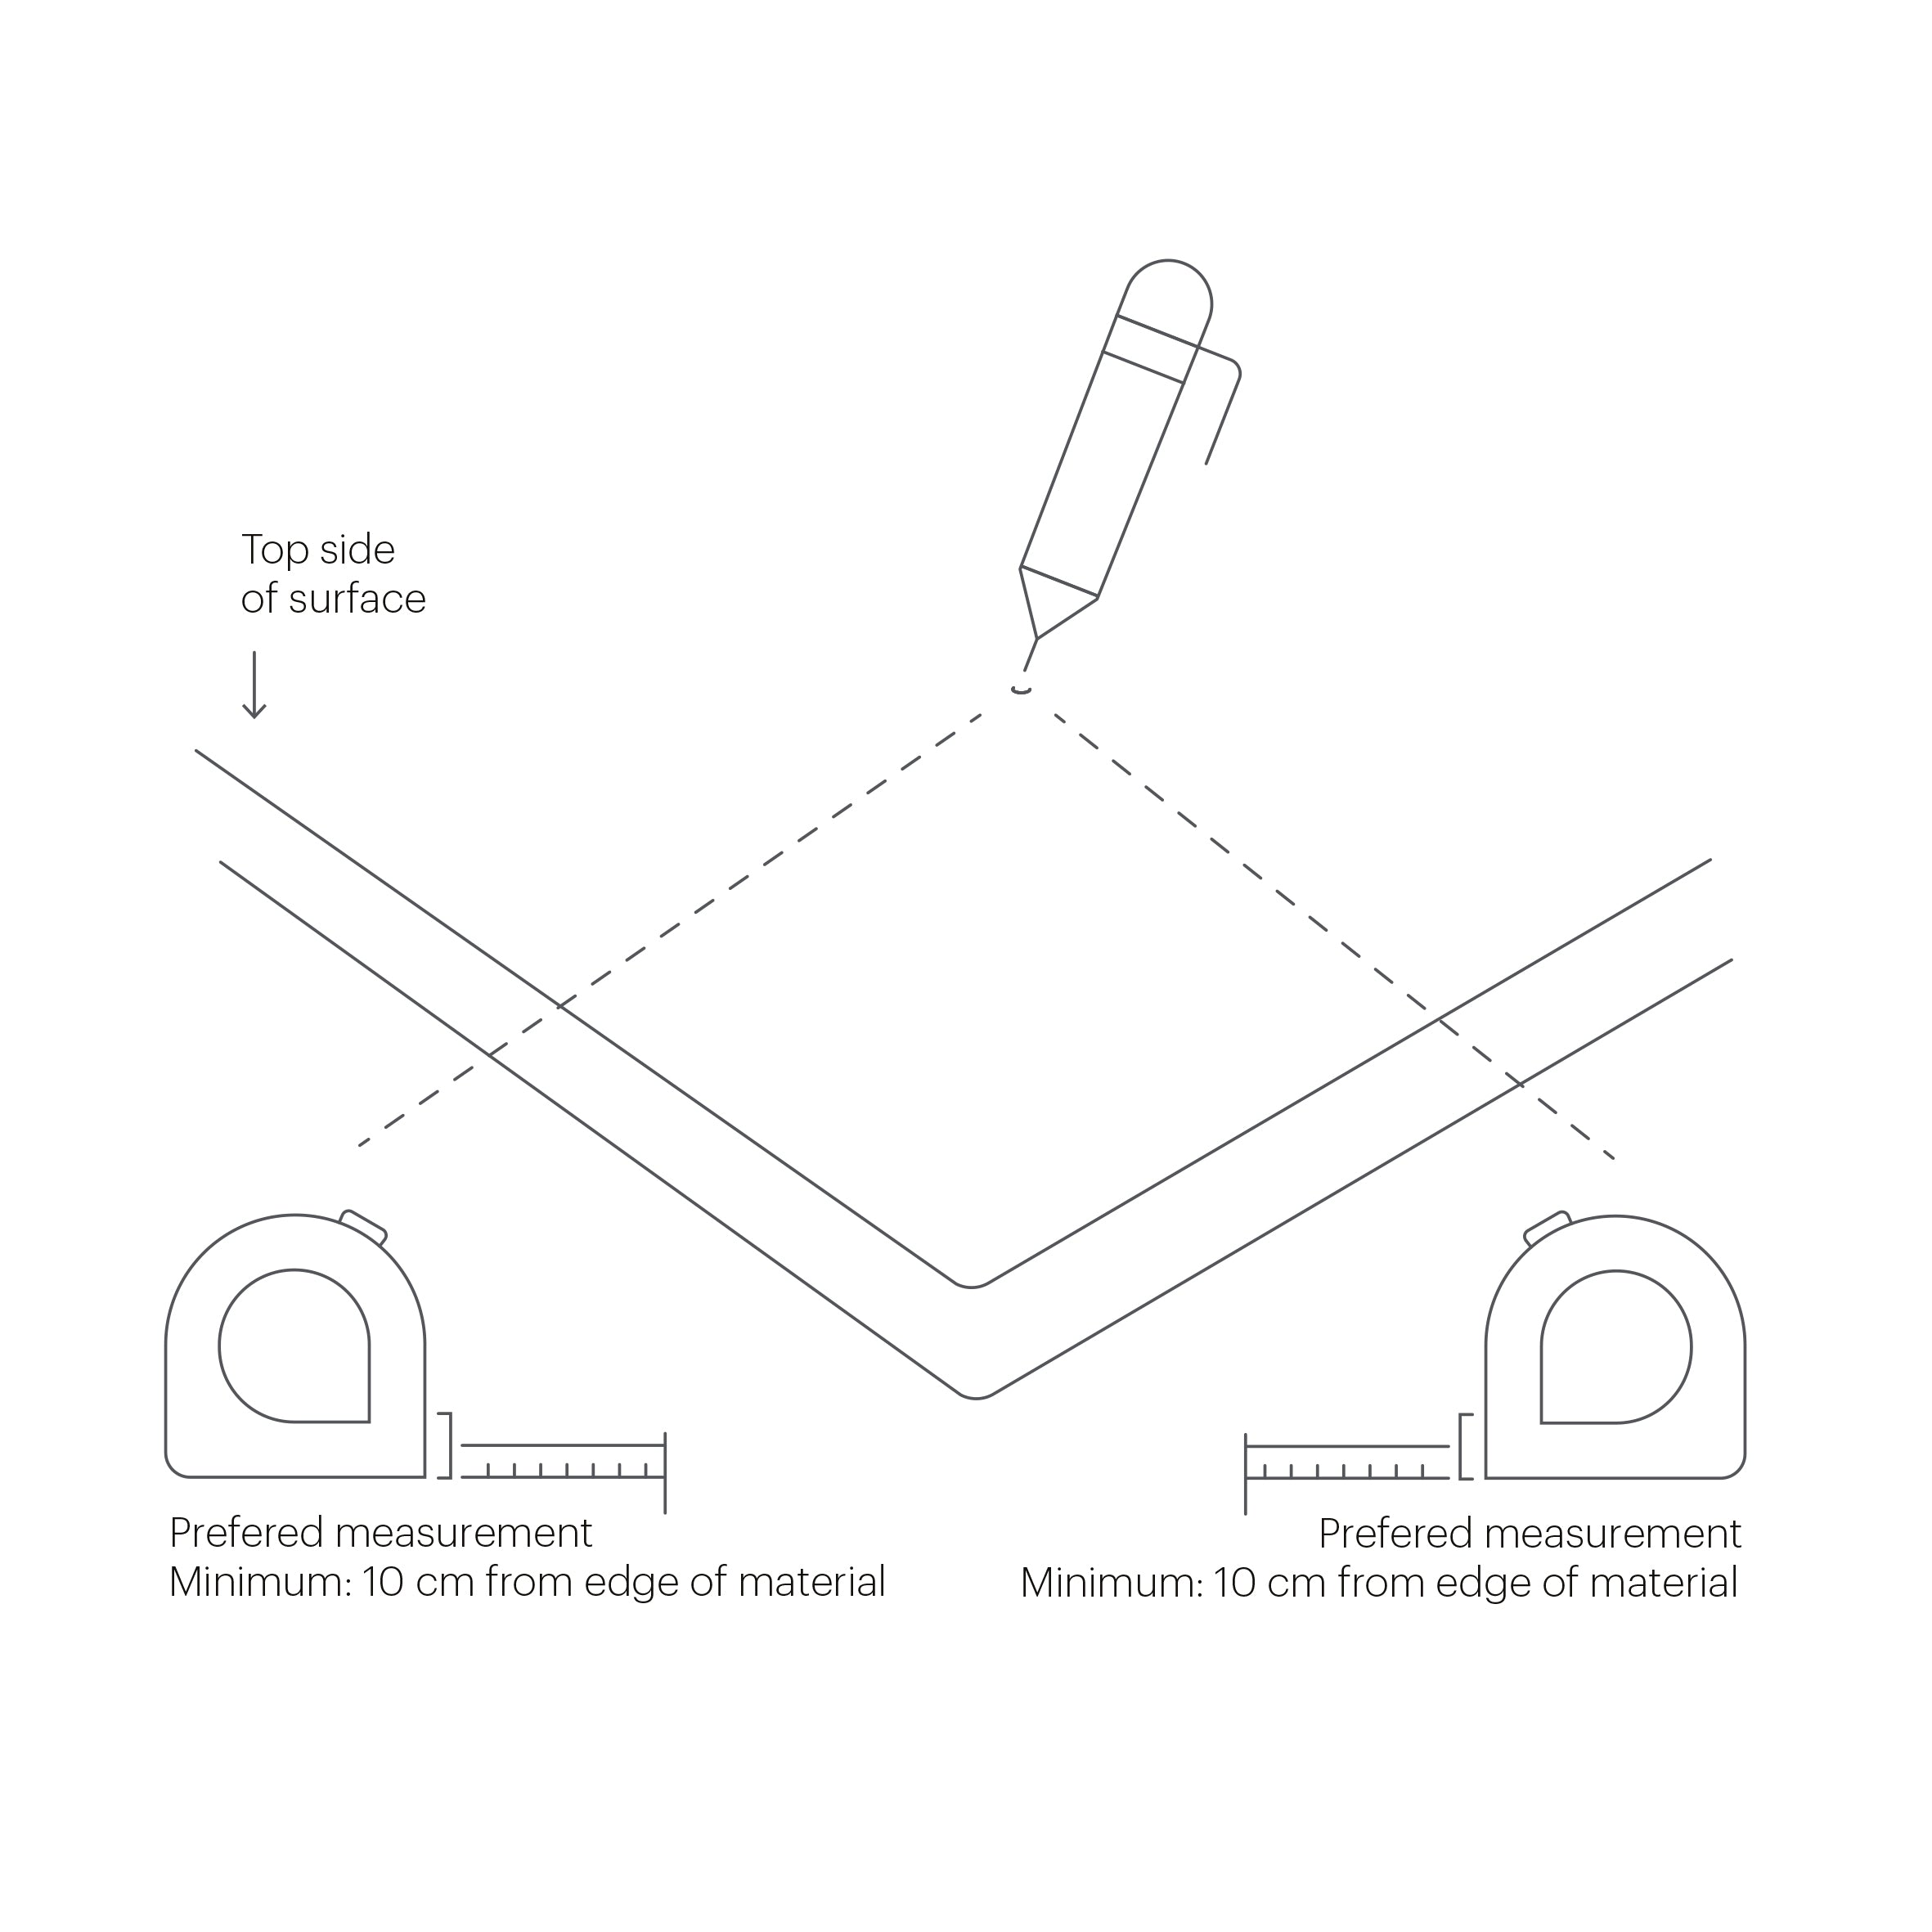
Measure first
1.) Measure a distance with a minimum of 20 cm from the edge of the material
2.) Draw a little dot to indicate the drilling position
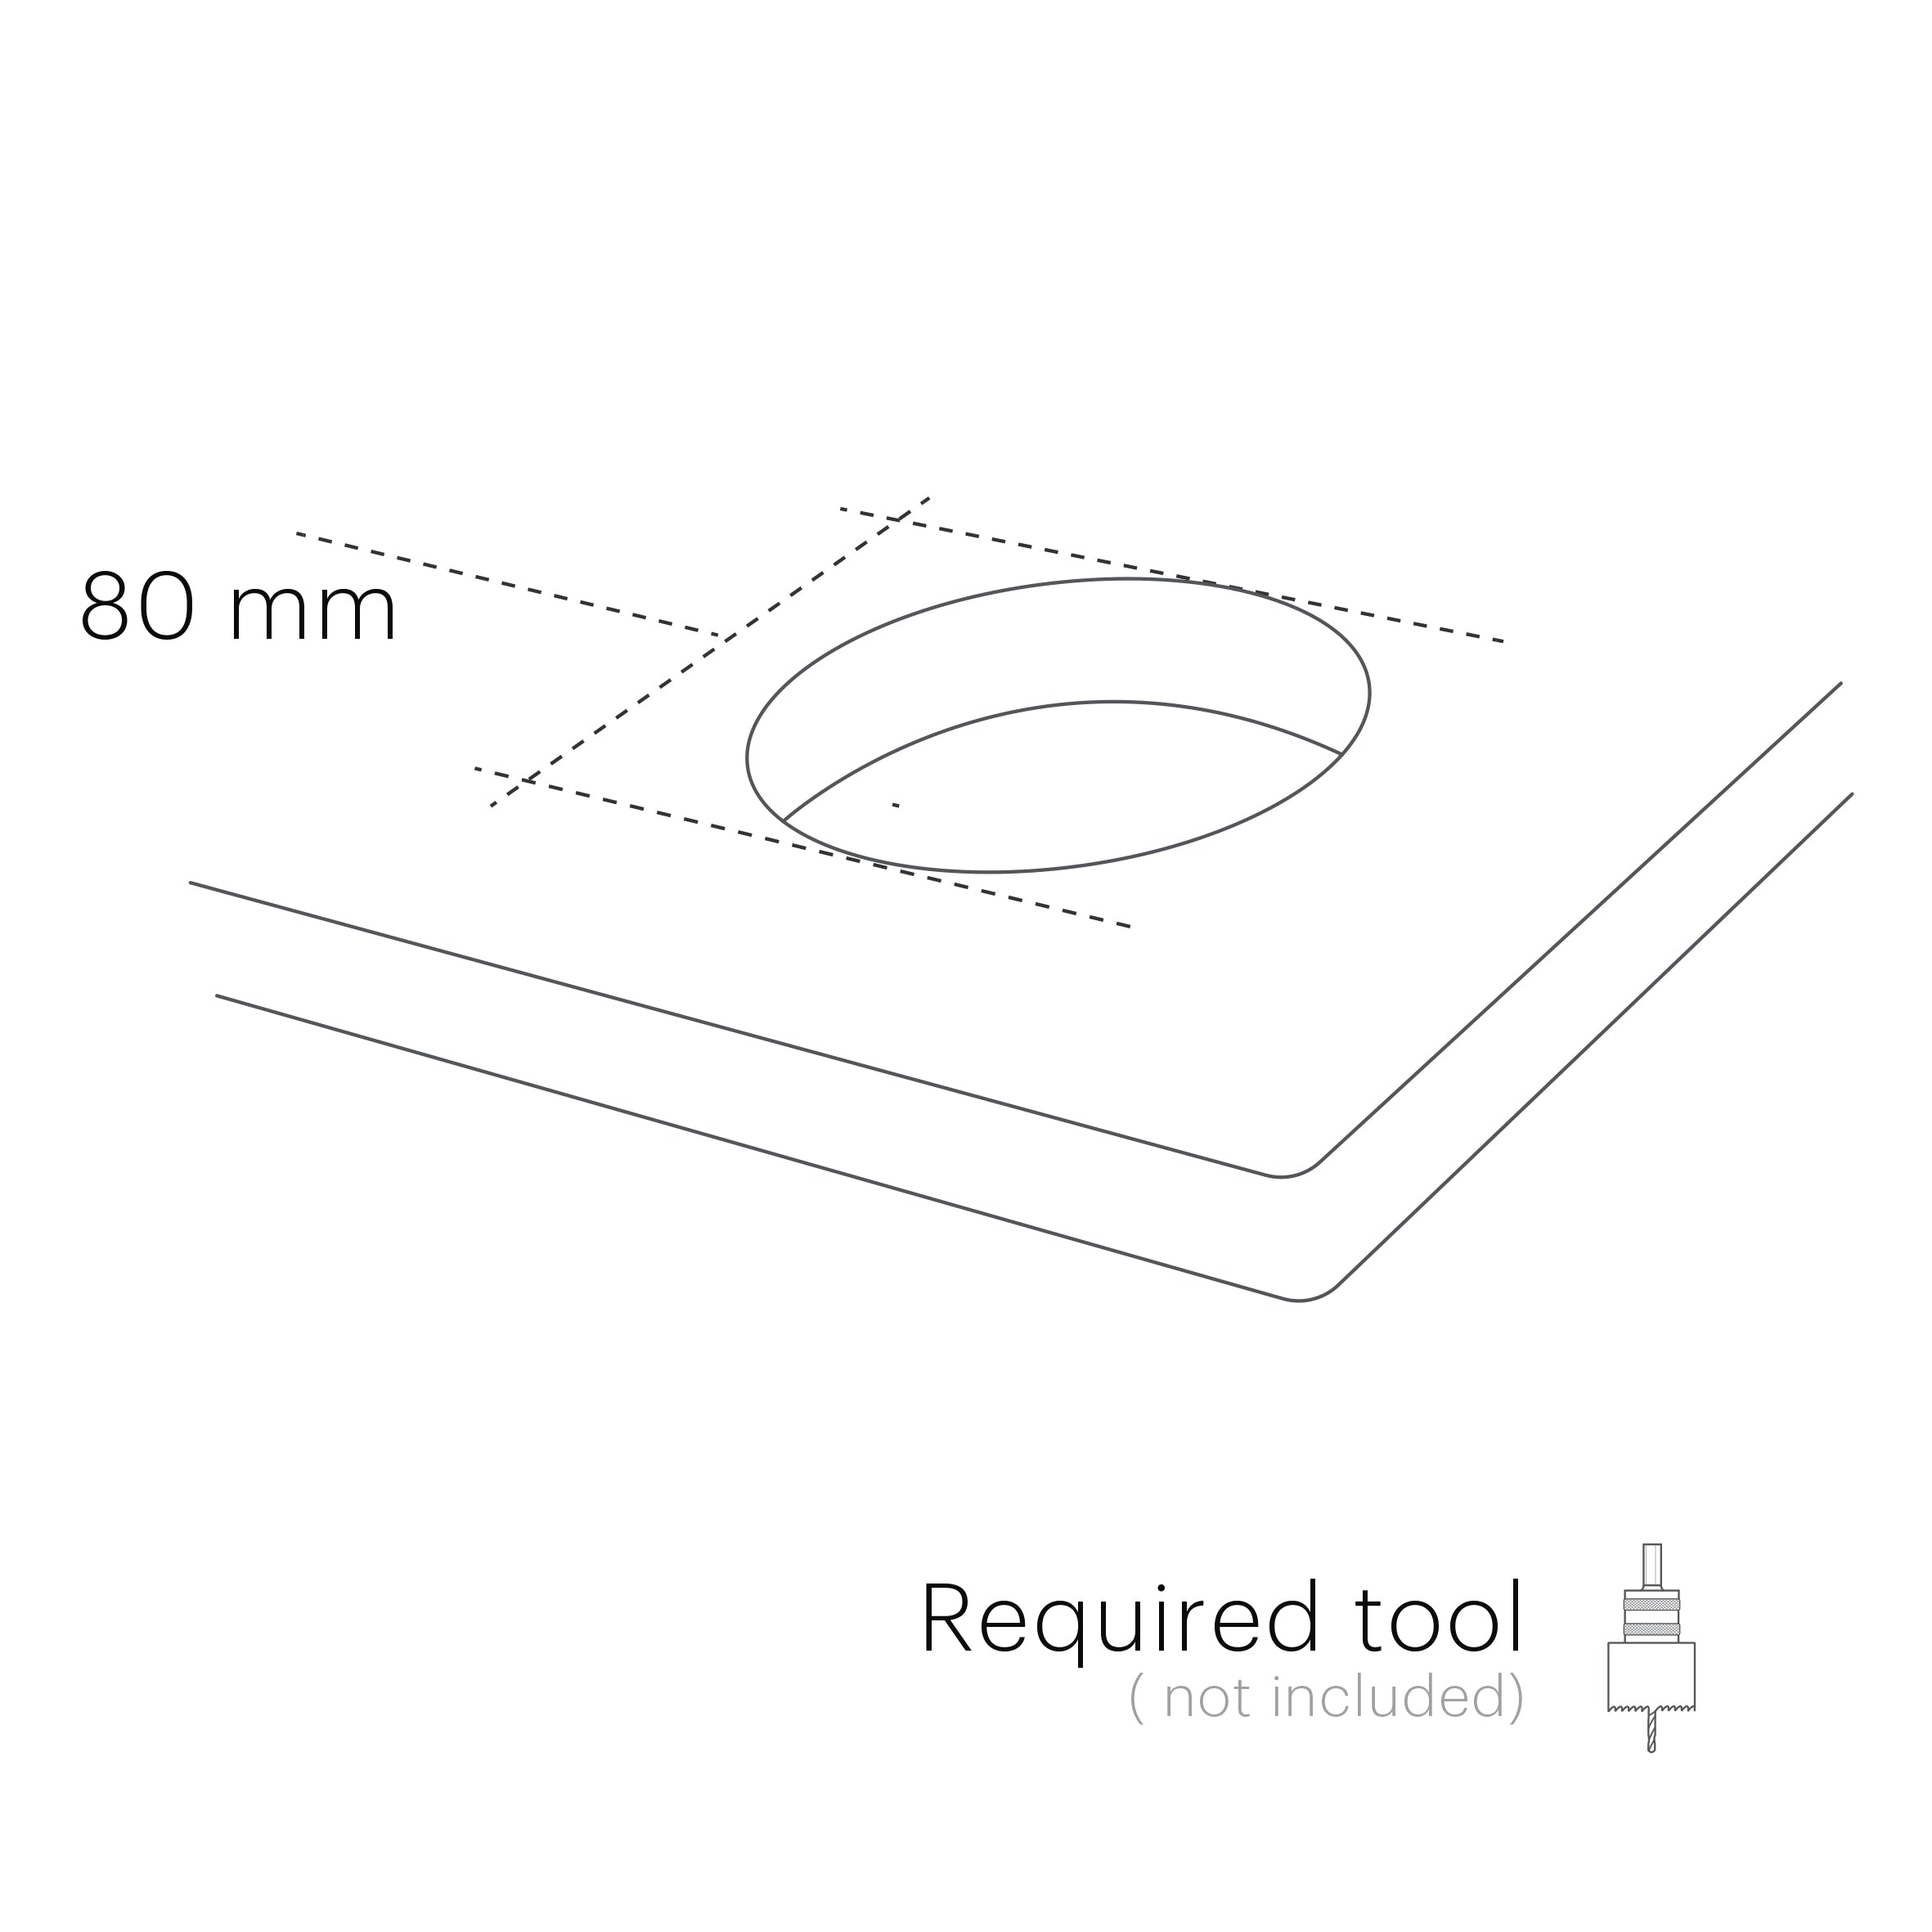
Drill the hole
3.) Drill a hole with a diameter of 80 mm in the surface at the position
where the PuK Combi HDMI should be placed.
Preferably use a 80 mm hole drill.
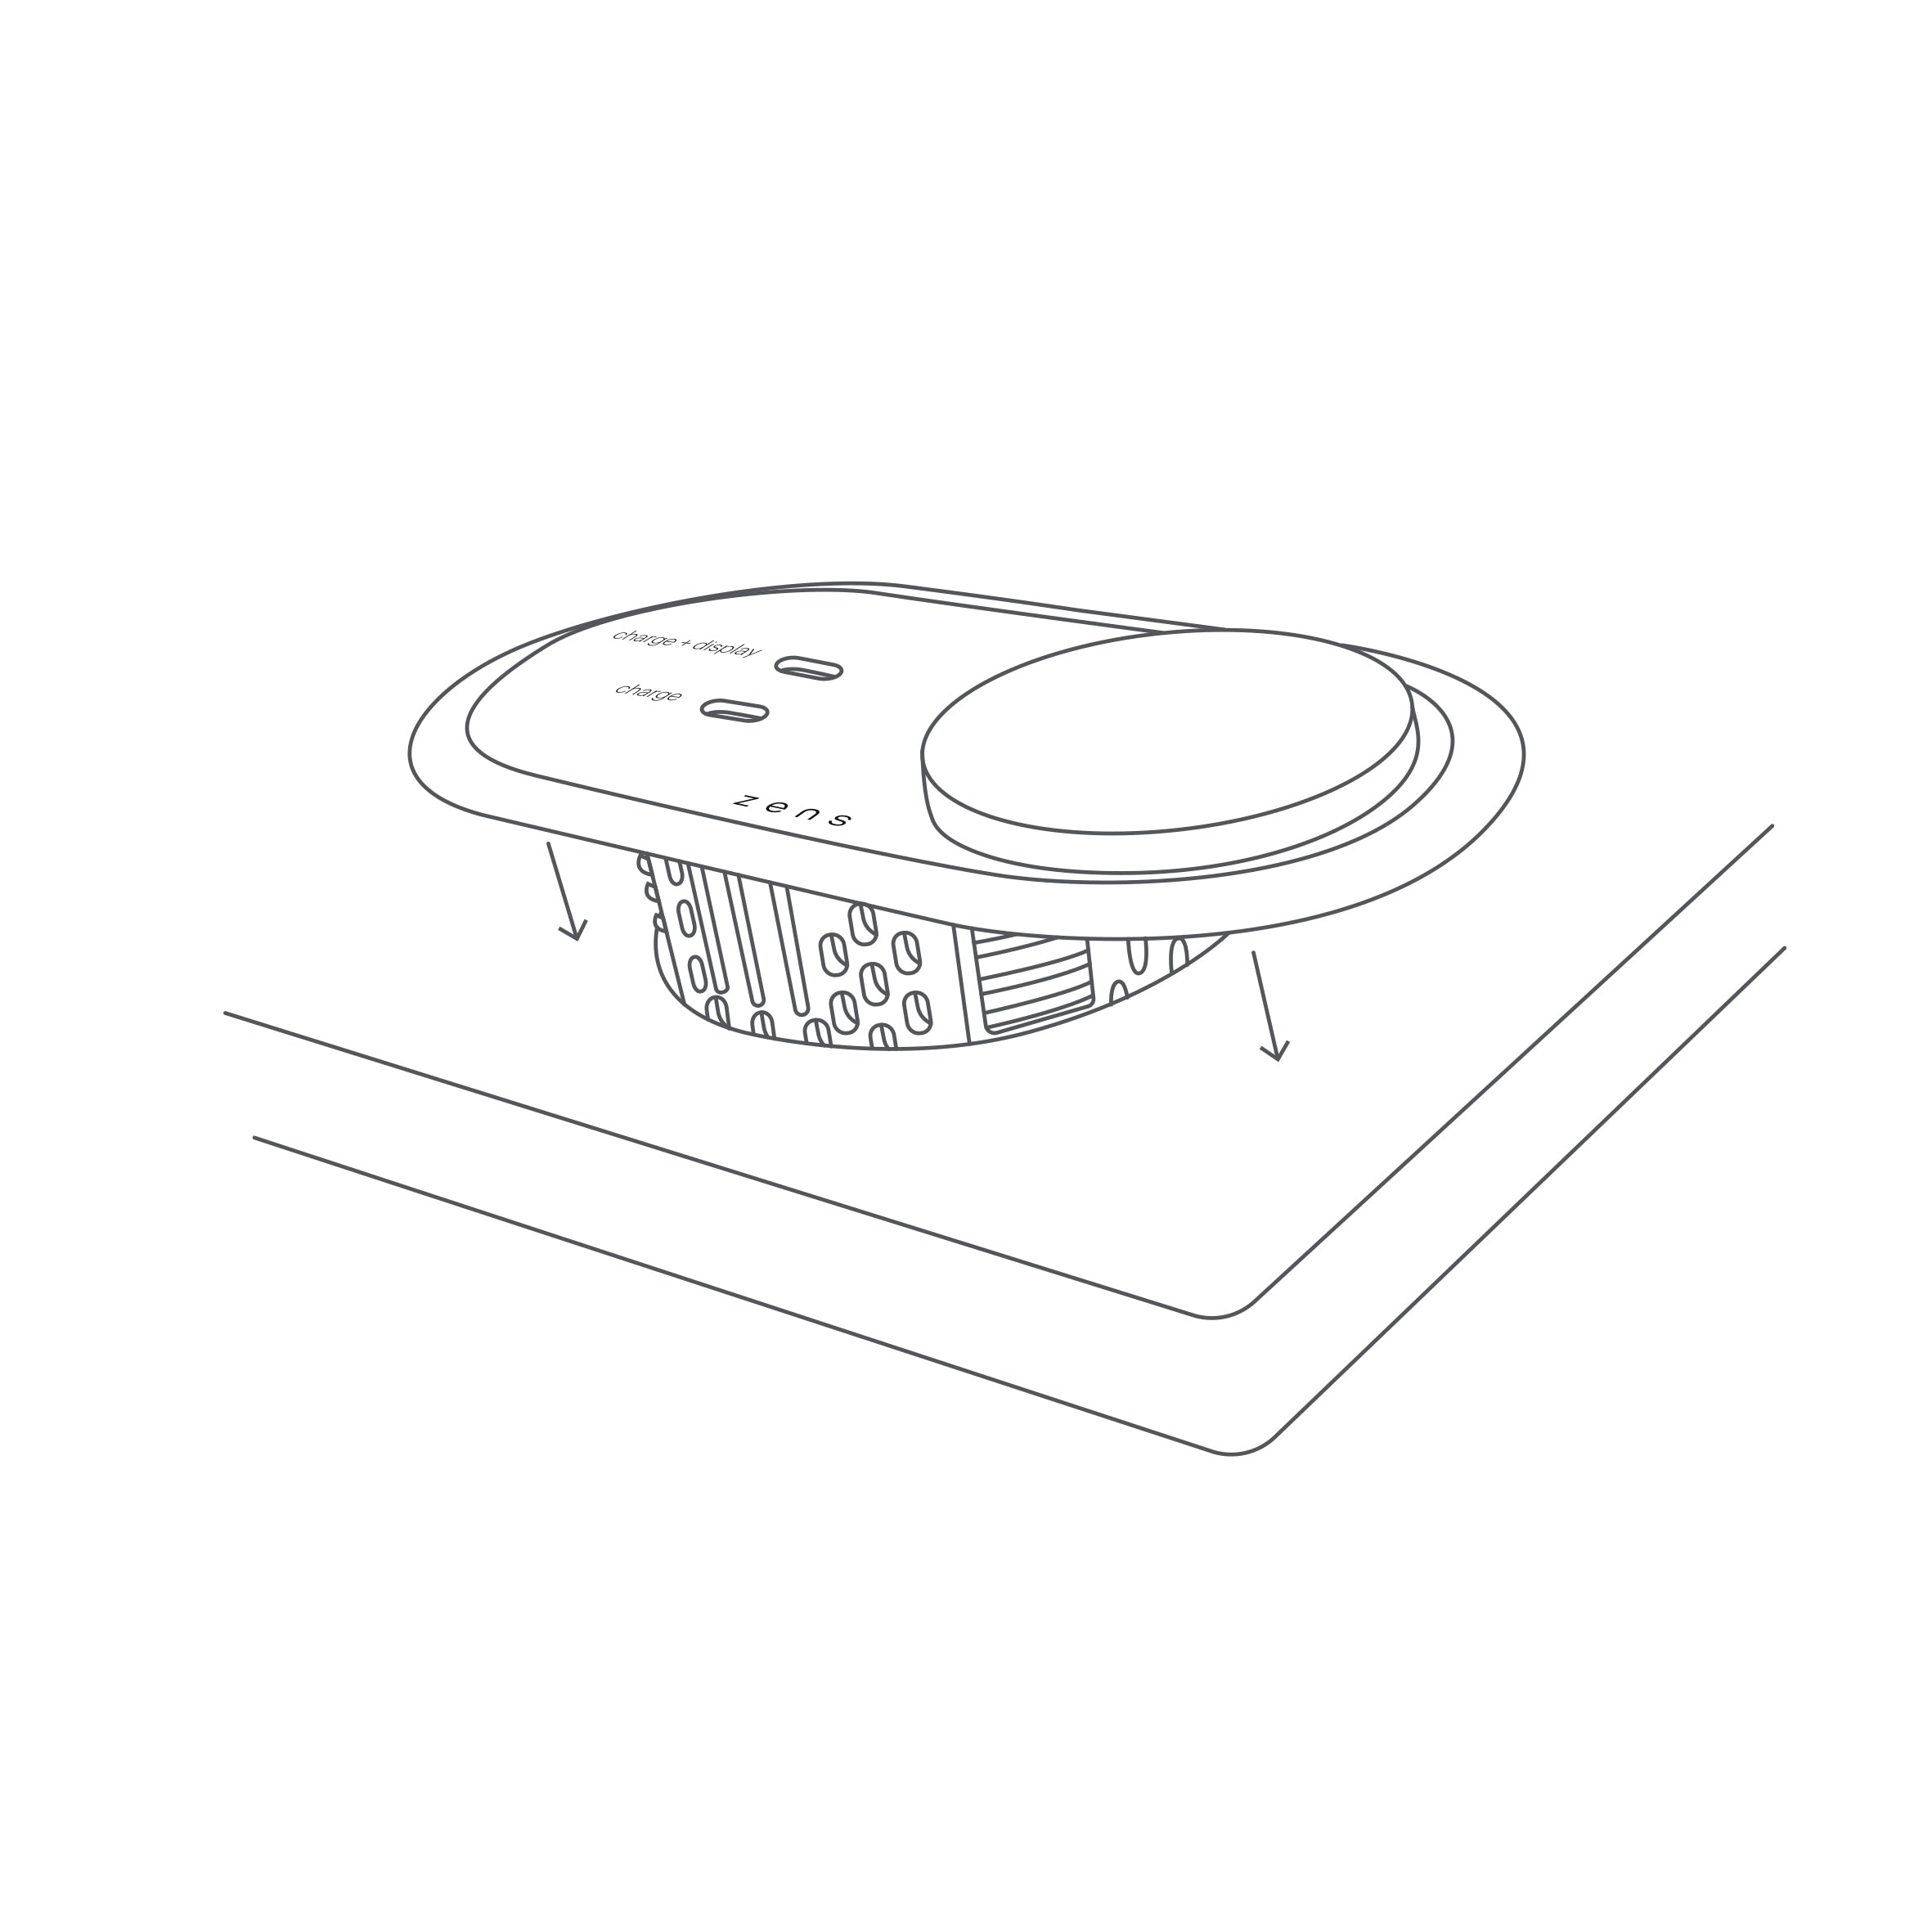
Place the PuK Combi HDMI
Insert the PuK Combi HDMI in the opening from above.
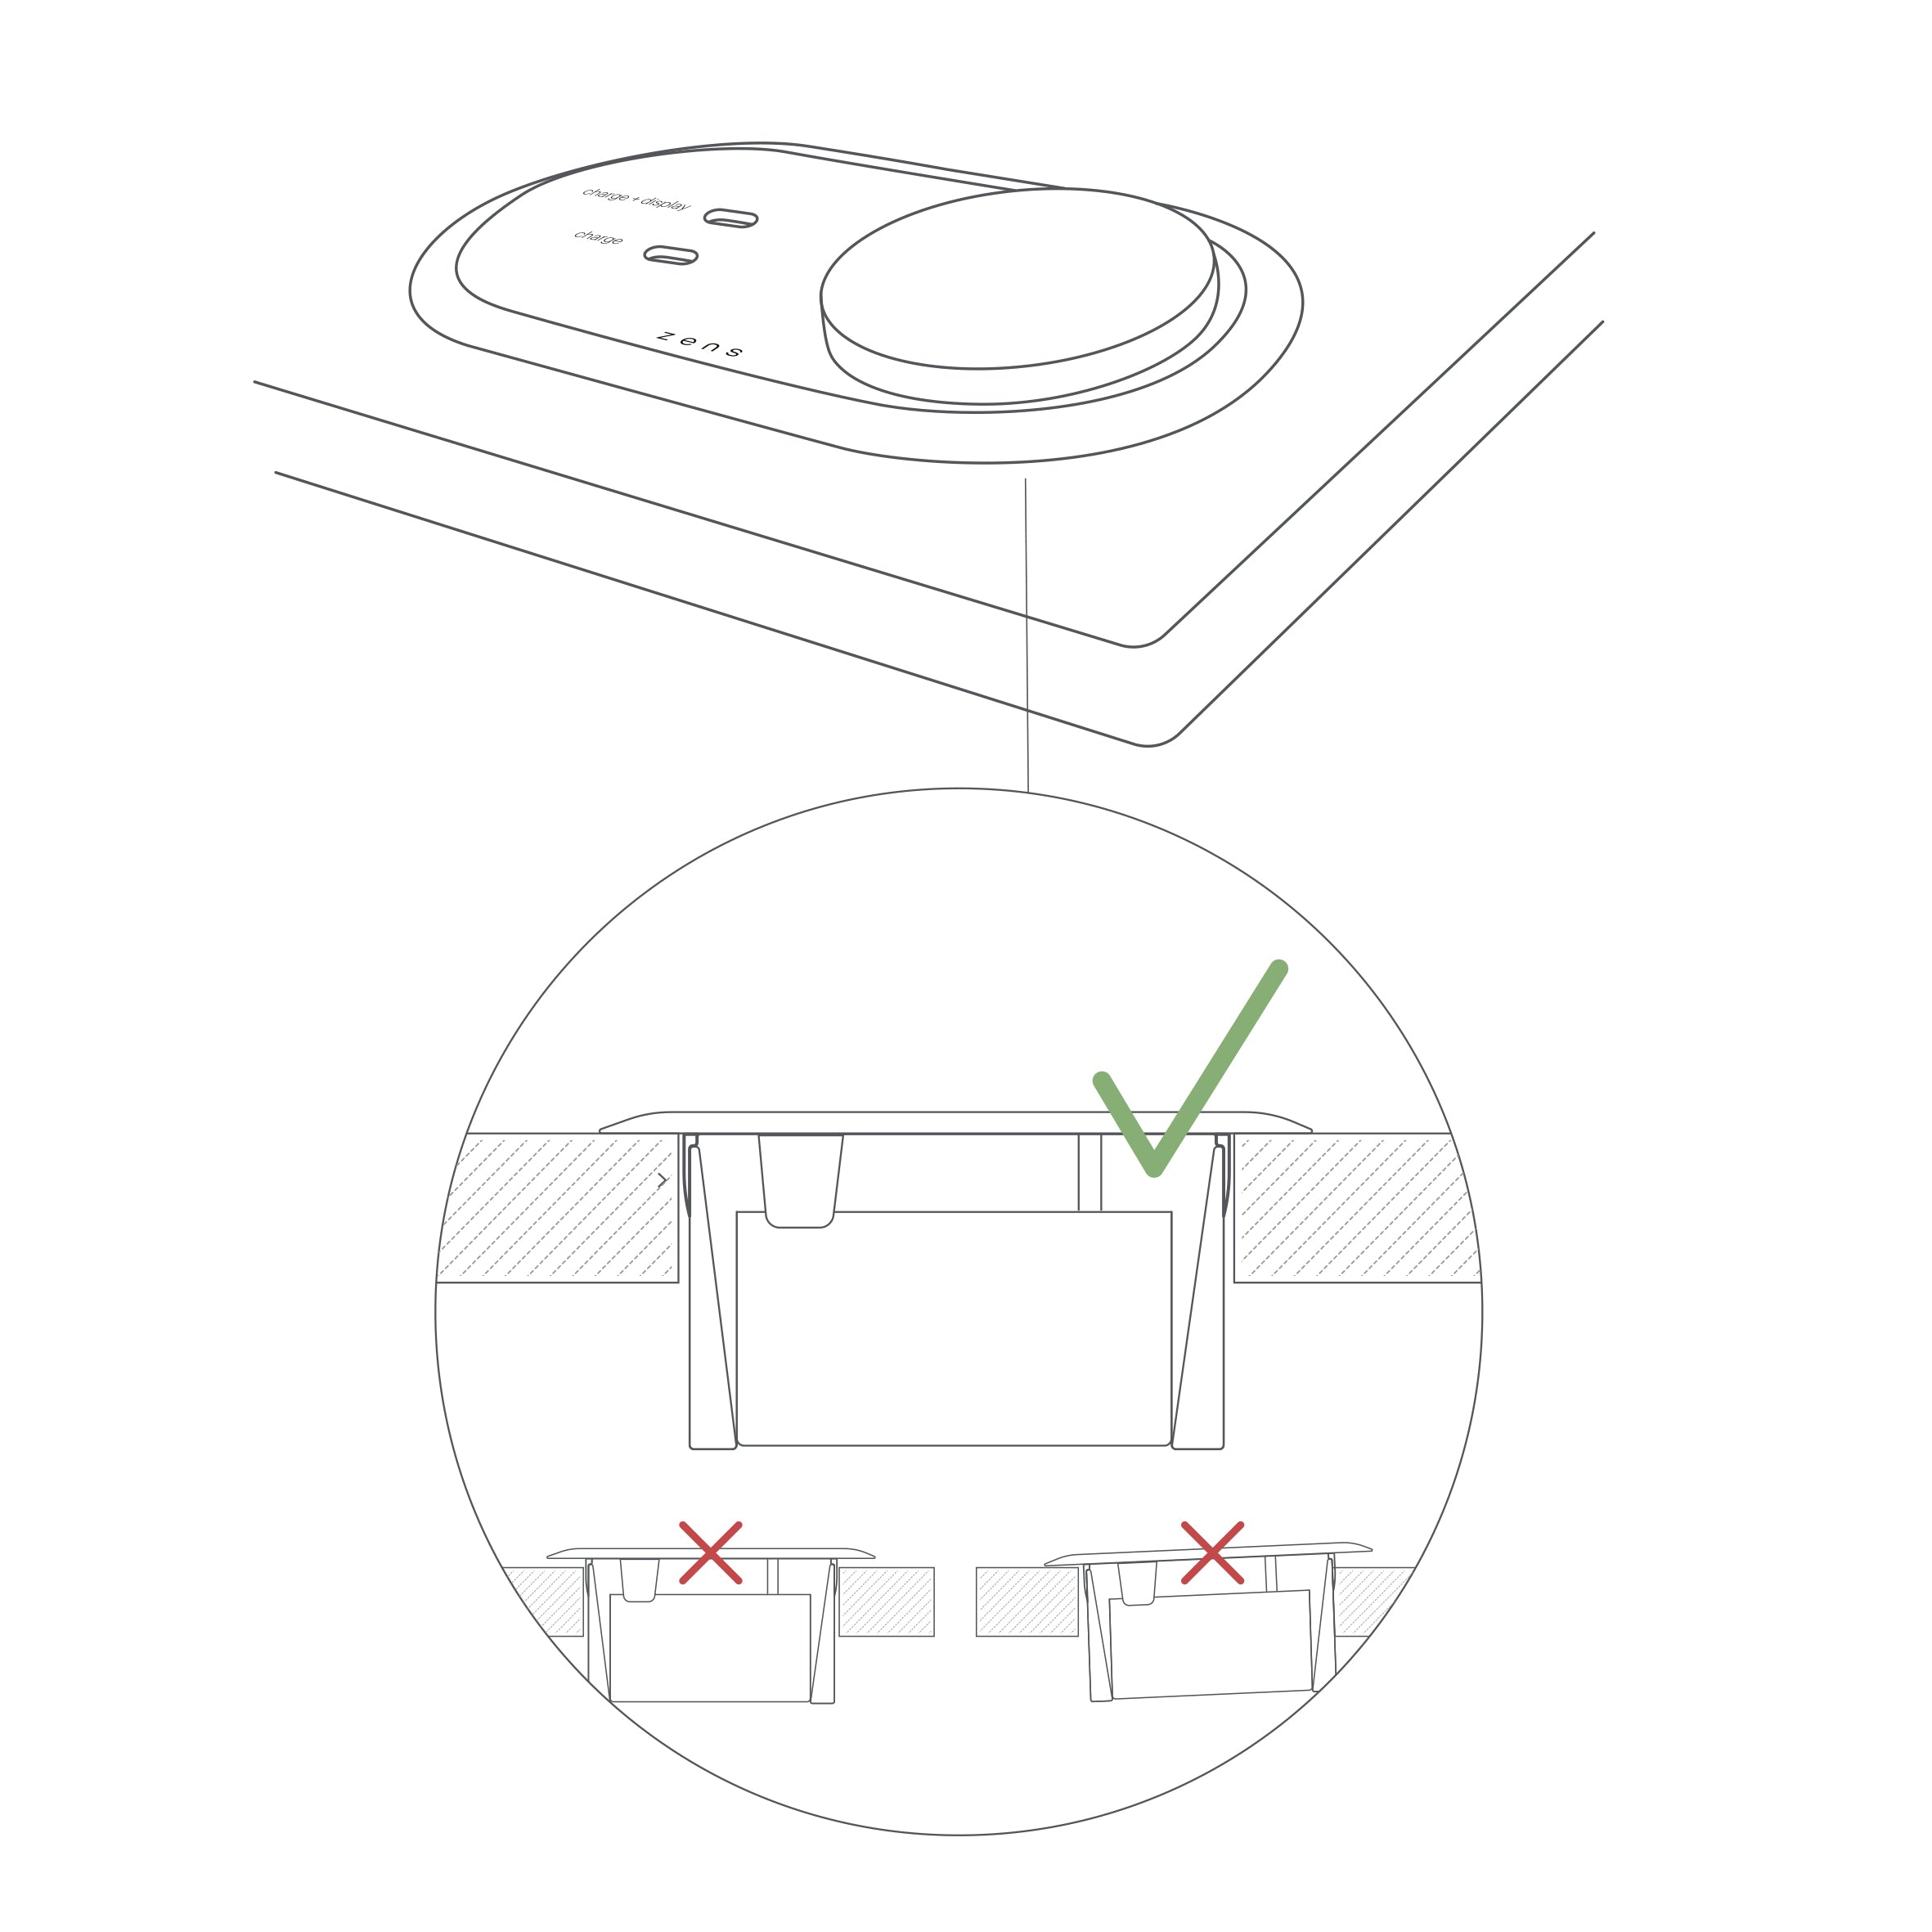
Align the PuK Combi HDMI
Be sure that there is no space between the topplate of the PuK Combi HDMI and the built-in surface.
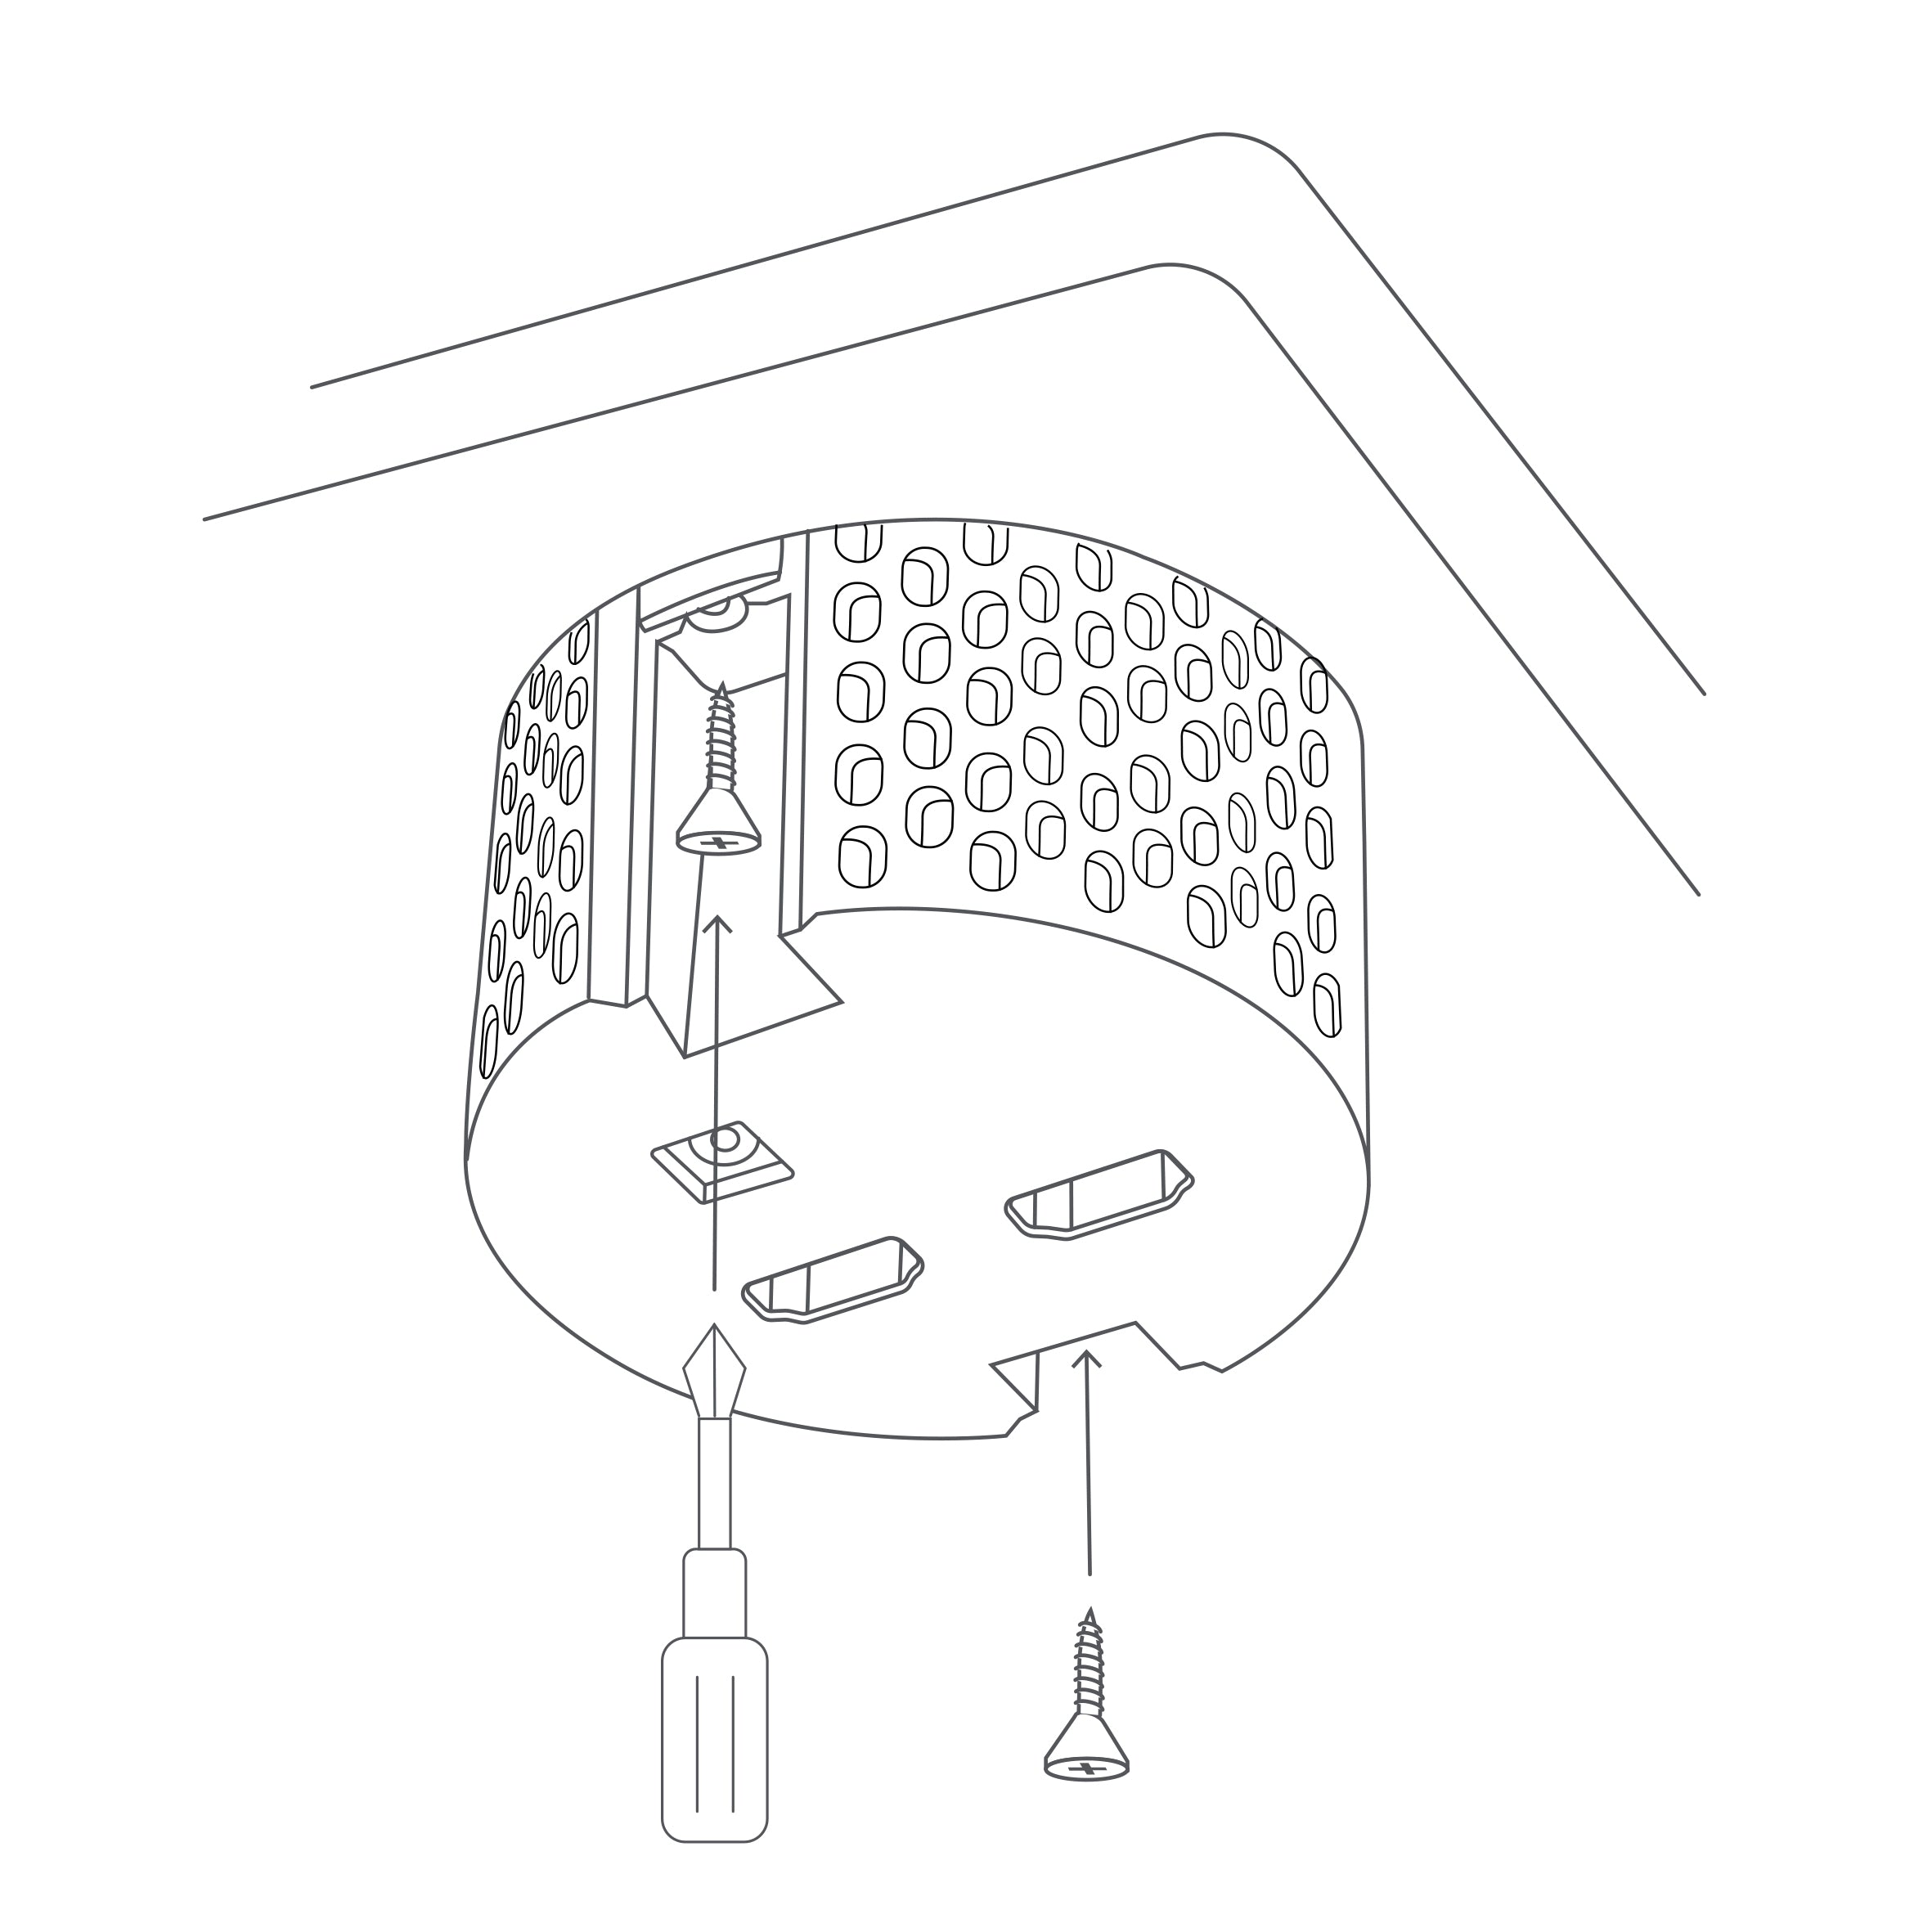
Secure the PuK Combi HDMI
Use the two screws to fasten the PuK Combi HDMI in the opening.
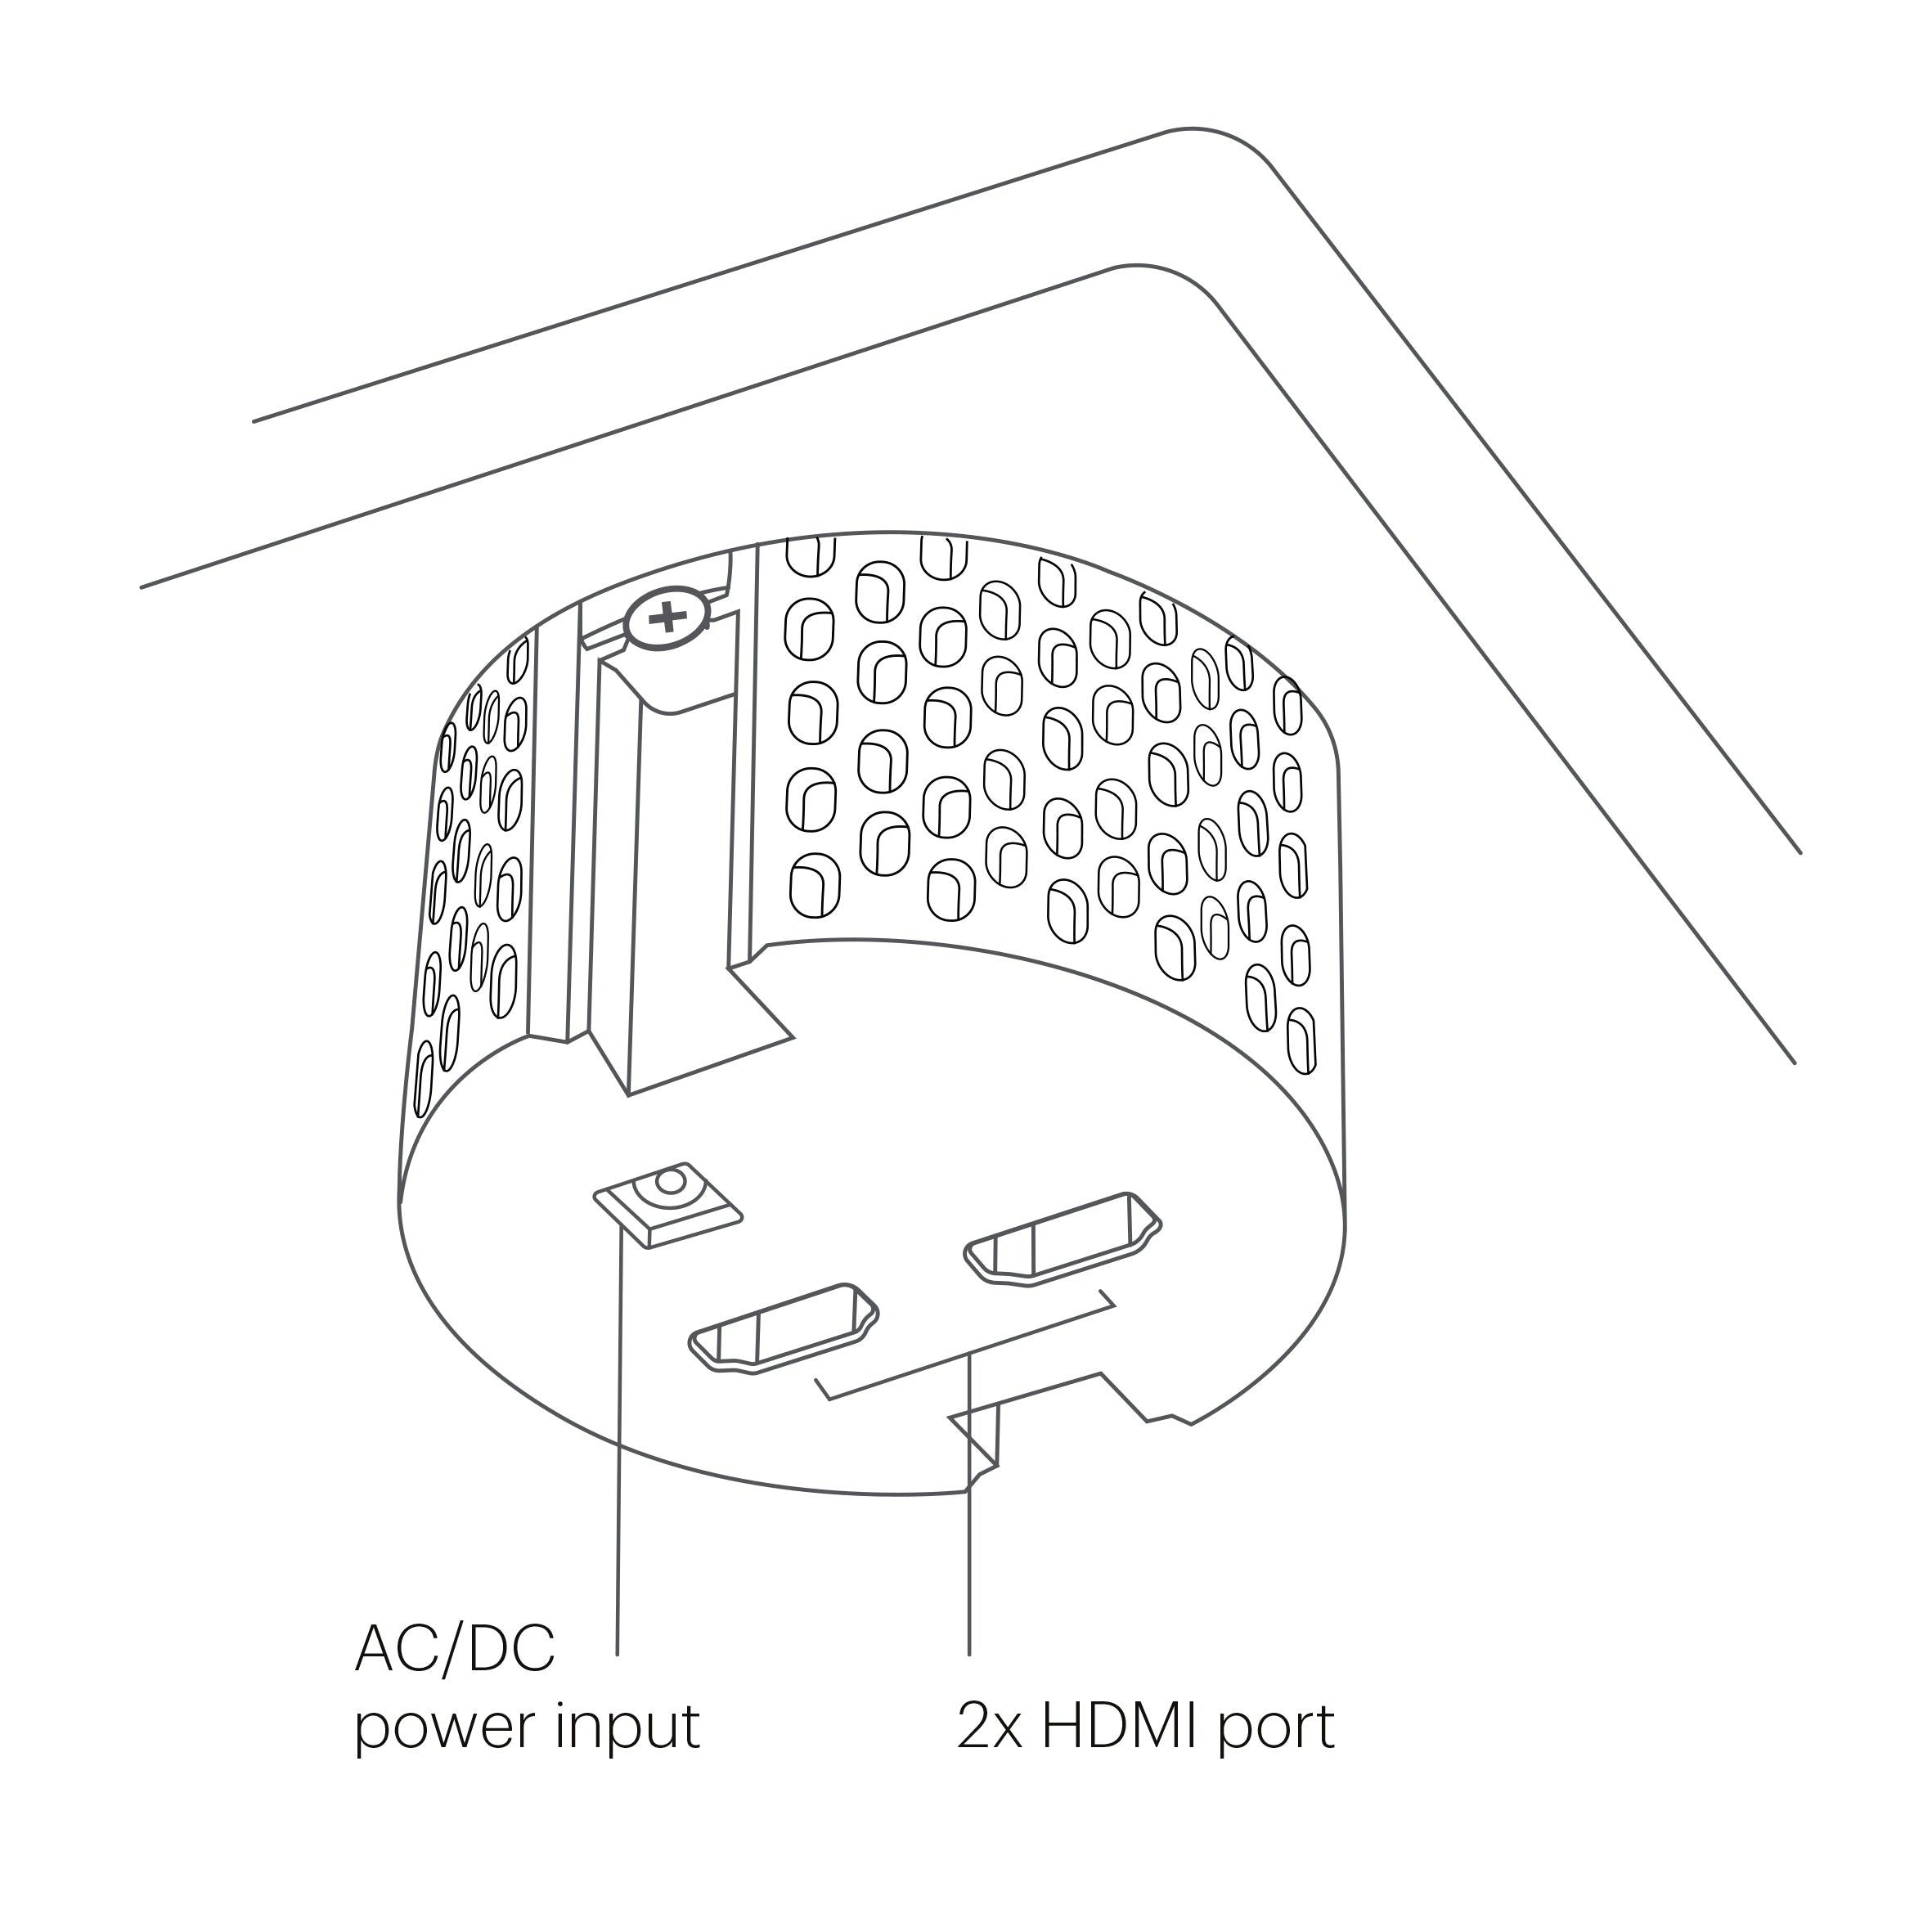
Inputs
• AC/DC Power input
• 2X HDMI Ports
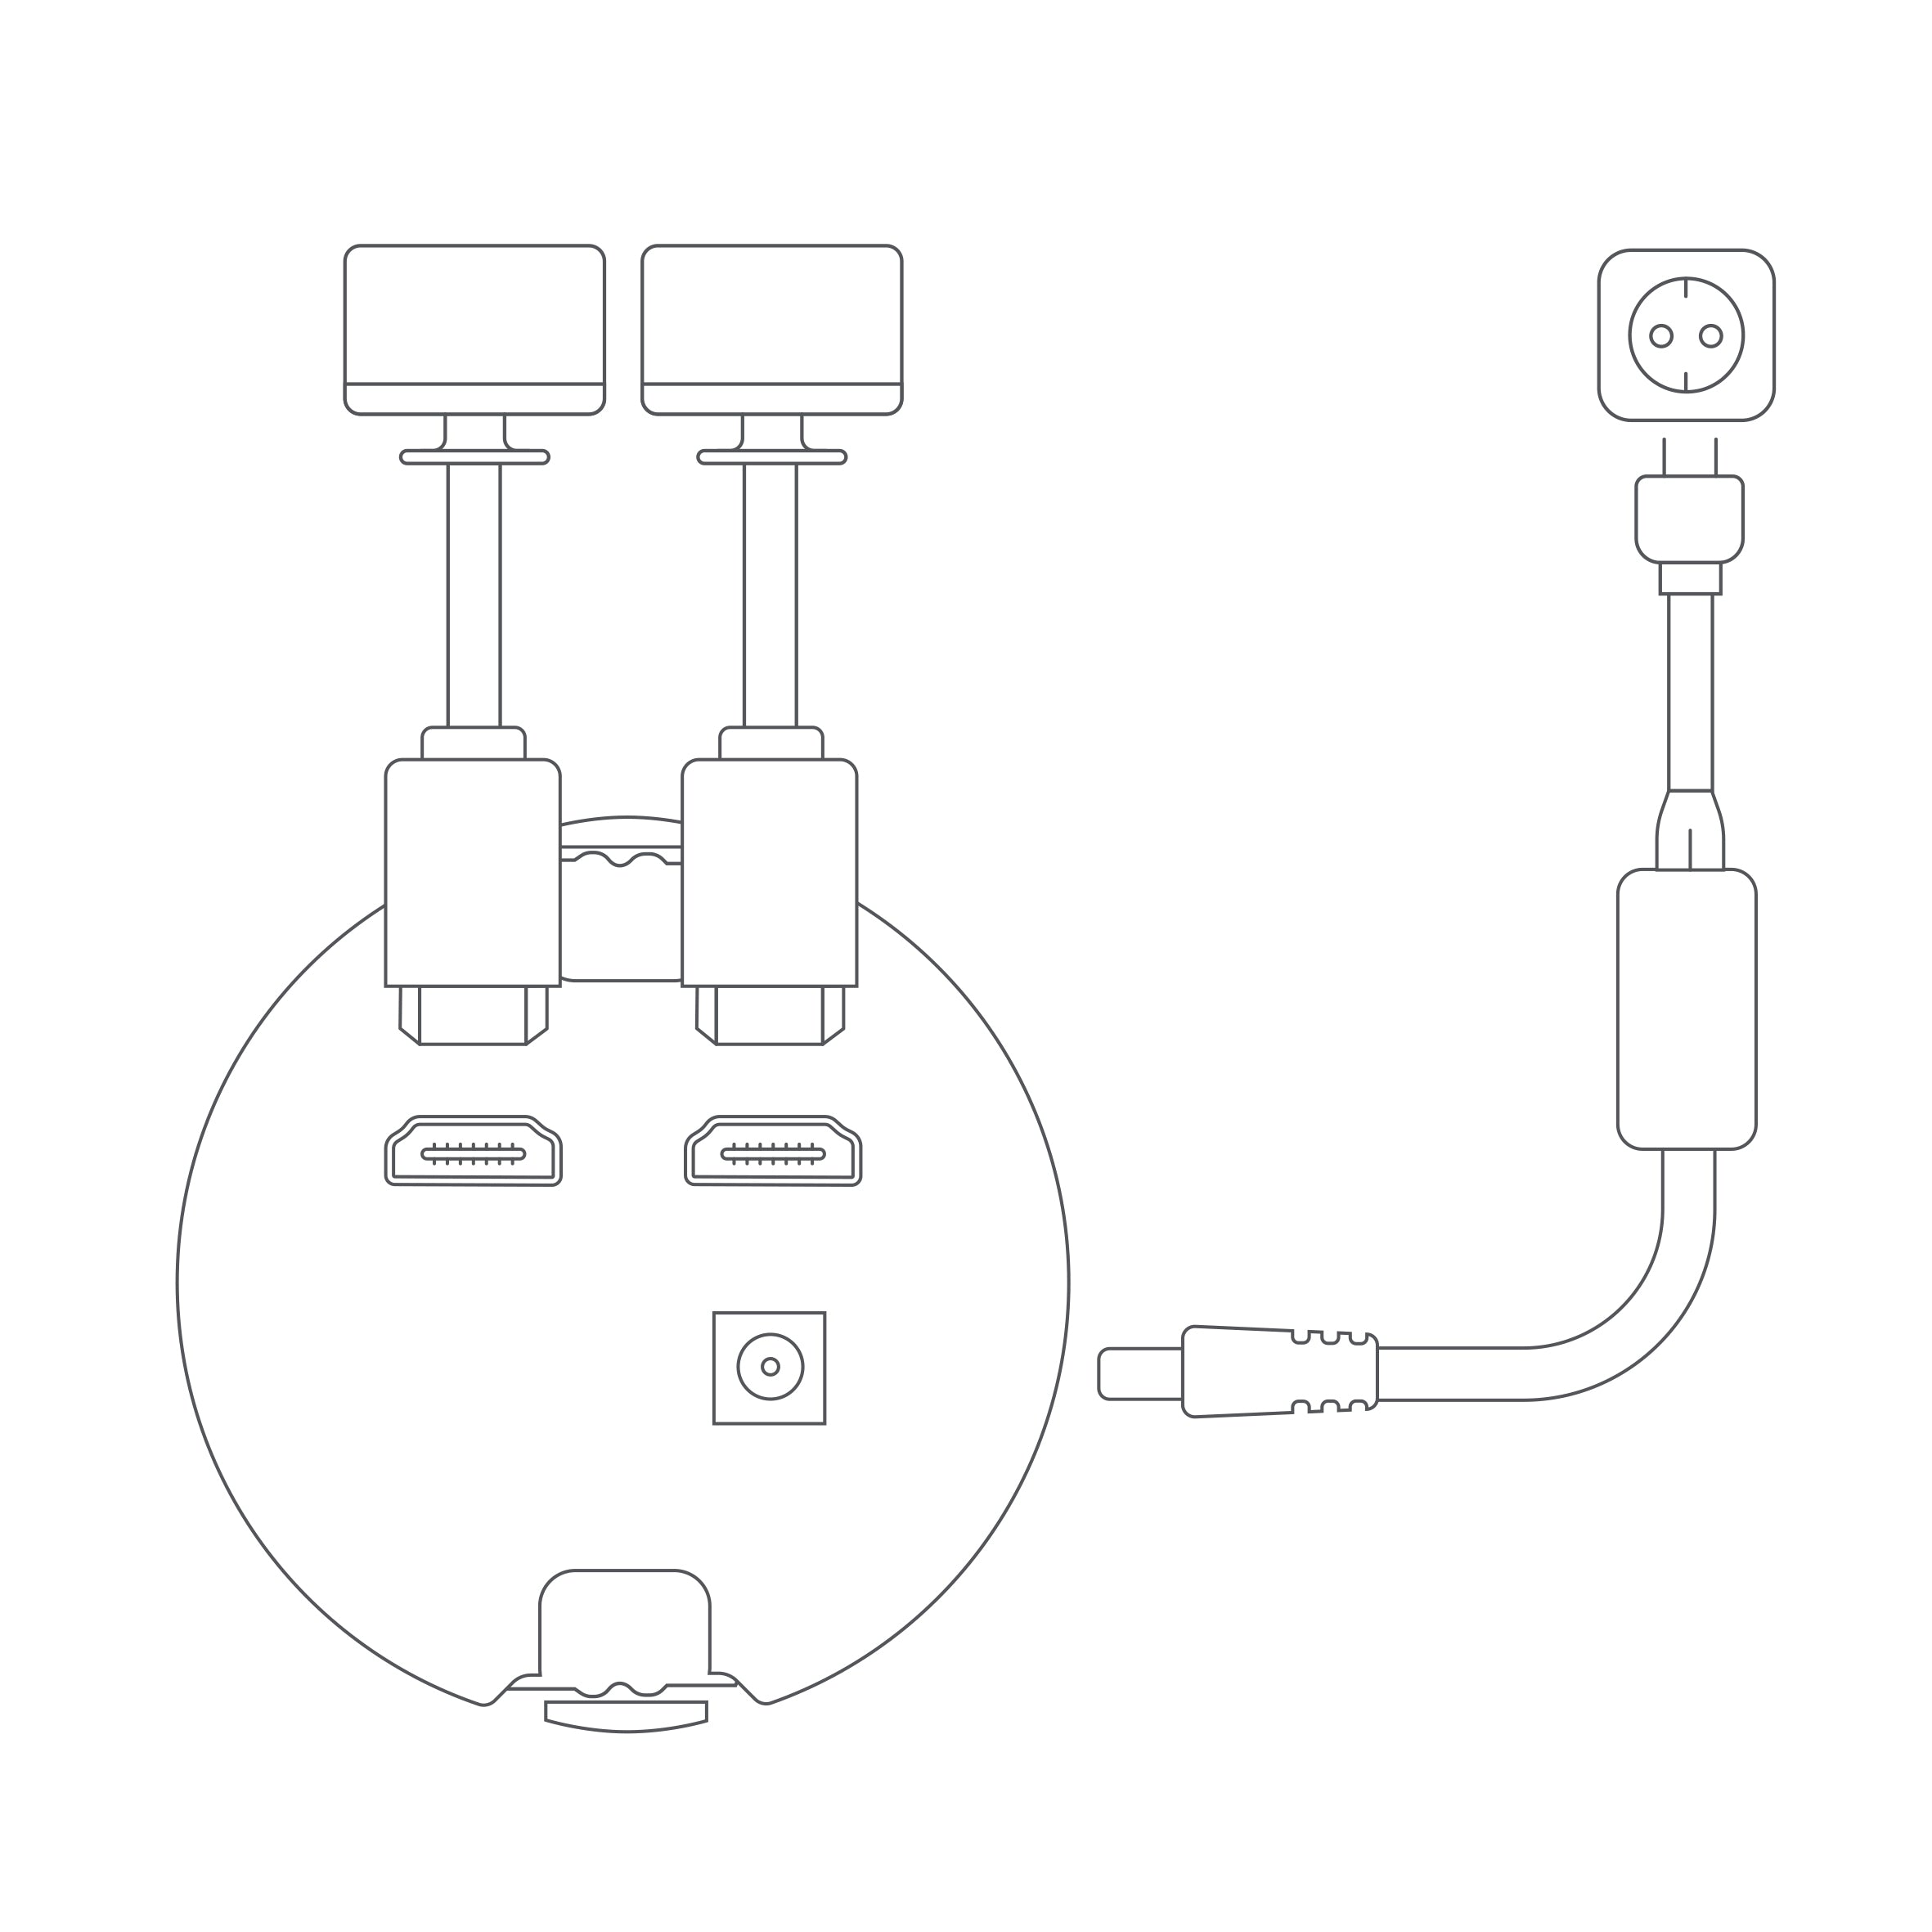
Installing the screens
Insert the power supply into the PuK Combi HDMI and the power plug into the nearest power socket.
Connect one or two monitors via the integrated HDMI ports. (HDMI cable not included)

Qi2 Magnetic charging
To start charging, place the Qi2 enabled device on the magnetic charging spot.
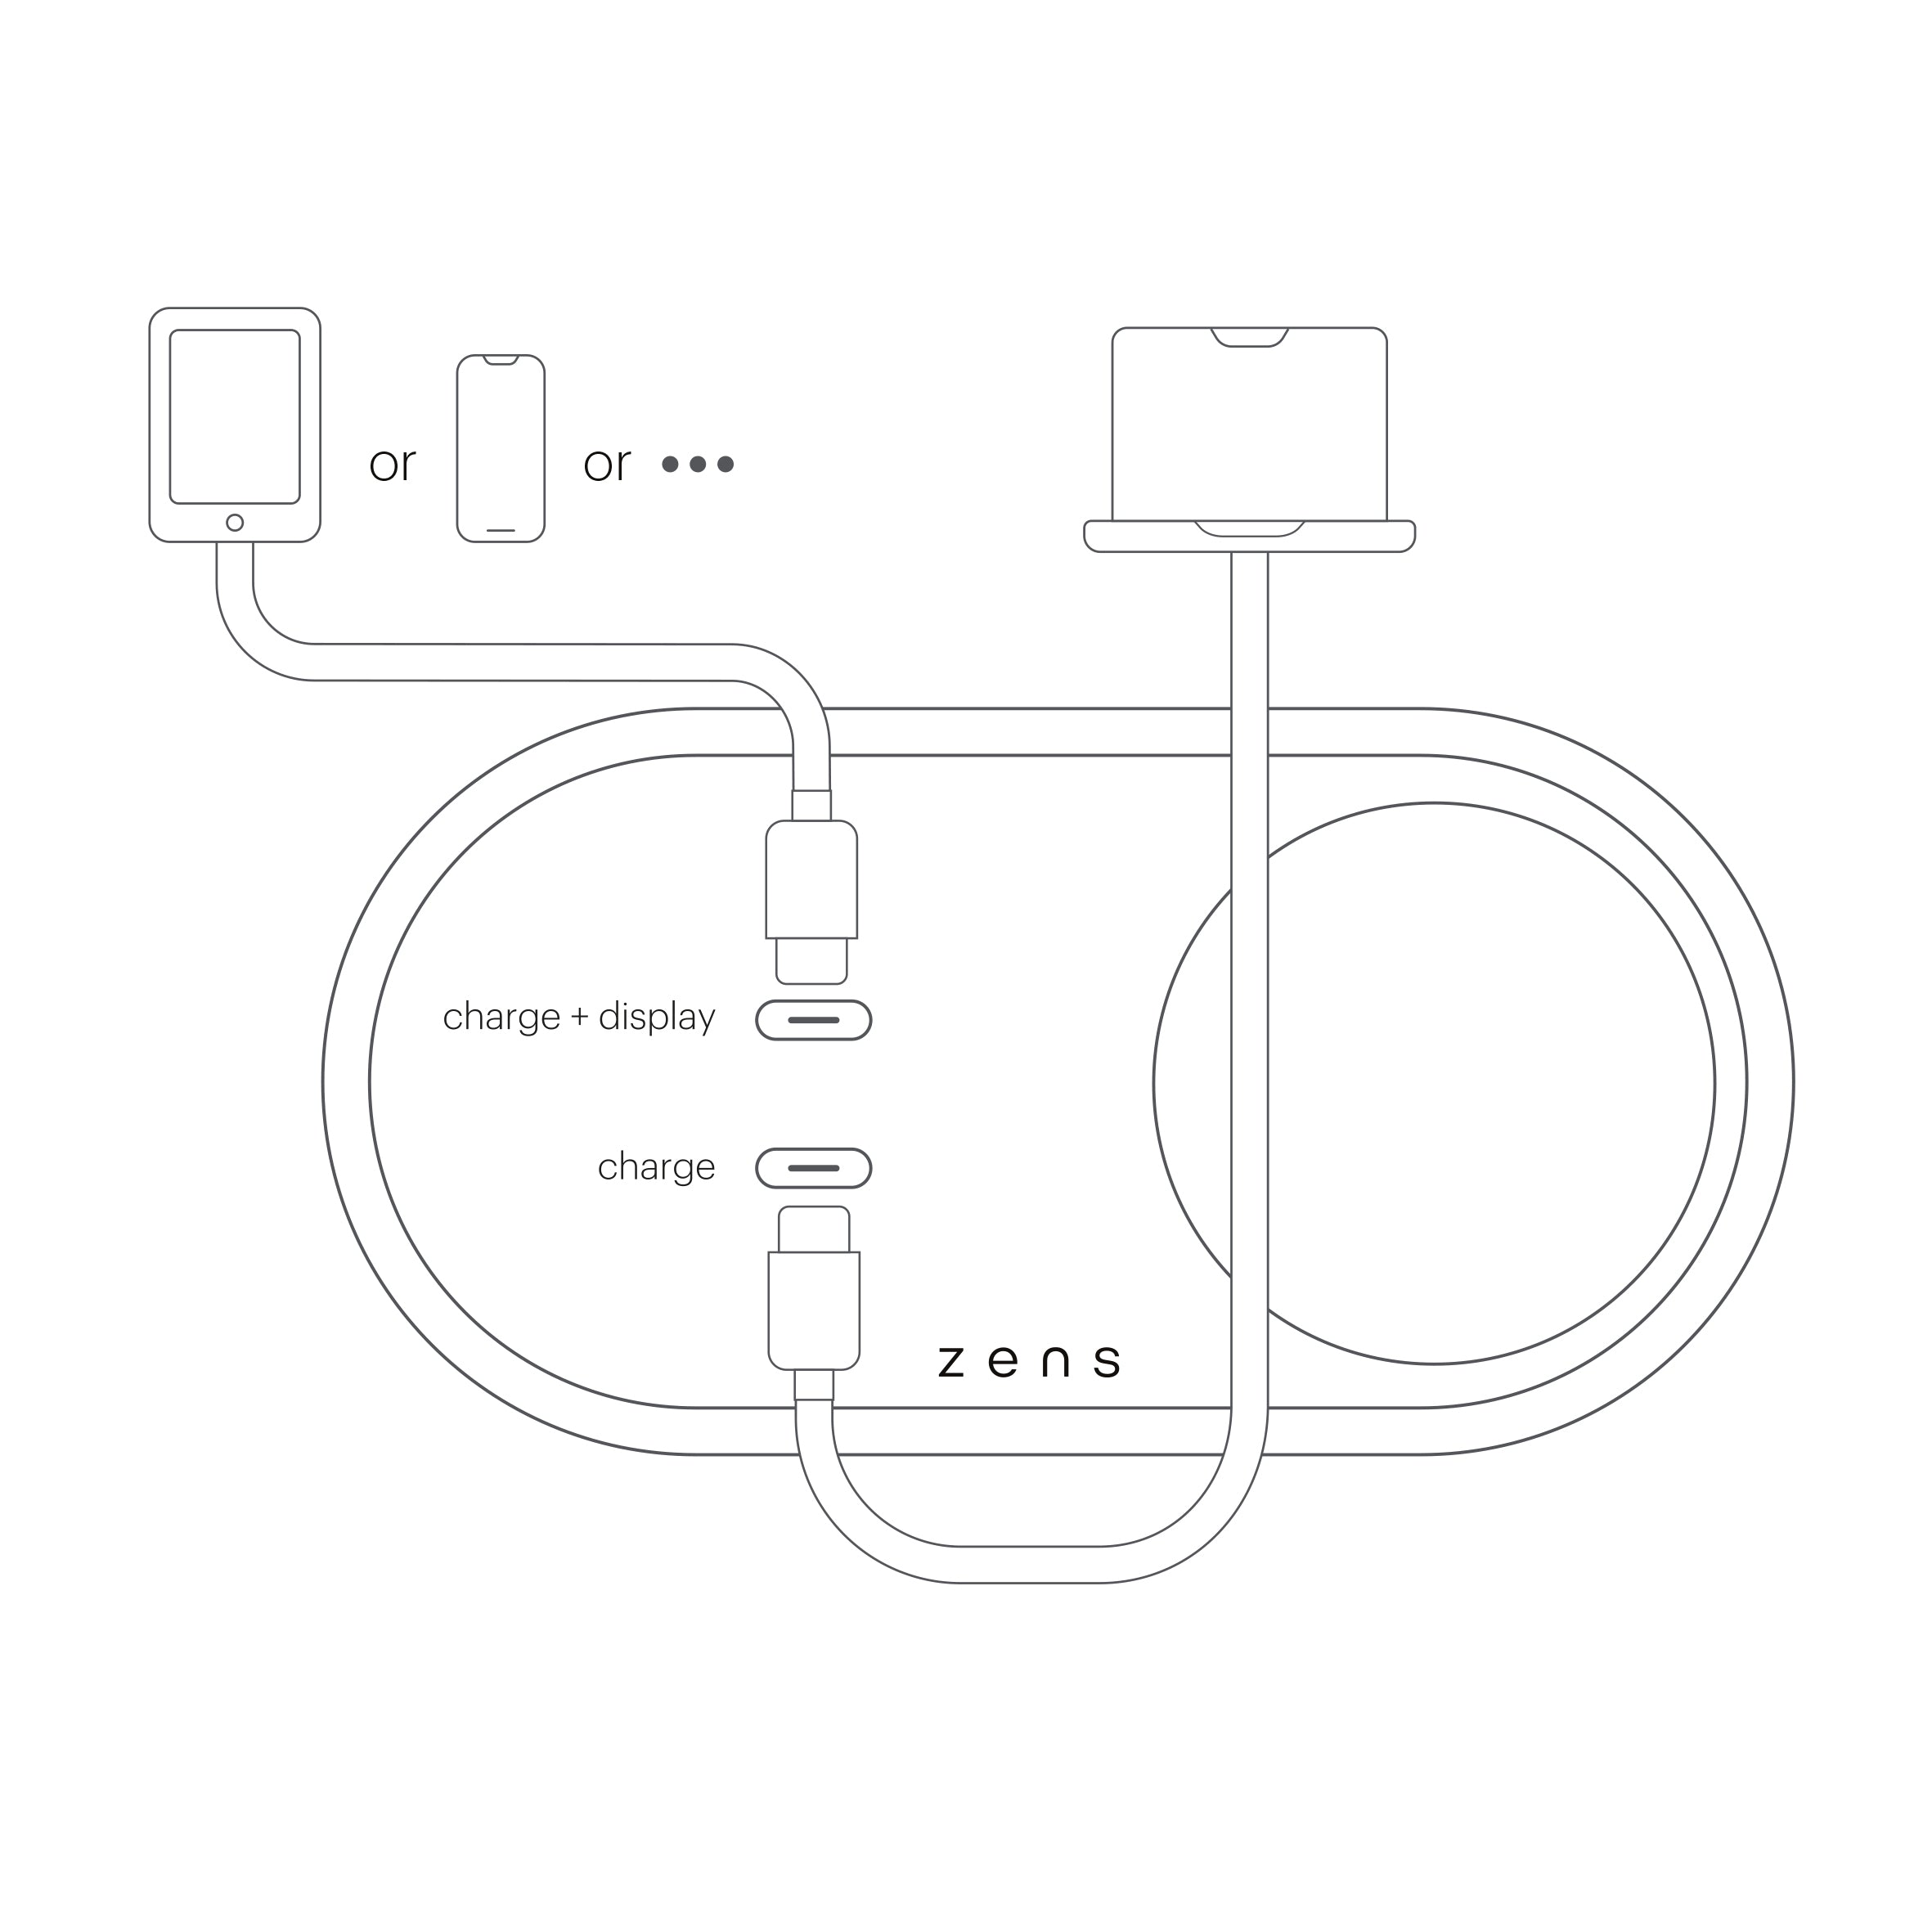
Use the PuK Combi HDMI
Connect USB-C power delivery cable* (not included) to charge + display port and your laptop to charge, share your screen and connect to internet. Set up your preferred screen settings on your laptop.
Use the charge port to charge a third device via a USB-C power cable.
P.S. Minimum cable requirement: USB-C 3.2 gen 2, 10Gbit/s, 4K (max resolution 3840 x 2160 pixels), 60W (100W recommended)


Support

Warranty claim

Returns within 14 days

Register your device